Kya Baat Hai! Hyderabadi Biryani – A Royal Treat From My Kitchen!
Namaste Doston! Adaab! Sat Sri Akal! Chef Curry Do’pyaza here, ready to whisk you away on a culinary journey to the heart of Hyderabad! Today, we’re diving deep into the fragrant, flavorful world of Hyderabadi Biryani, a dish fit for kings (and queens… and you!).
This isn’t just any biryani; it’s the biryani. It’s the star of Eid celebrations, the life of the party at weddings, and a comforting treat during chilly winter evenings. Imagine the aroma of spices filling the air, the tender meat melting in your mouth, and the fluffy rice dancing on your tongue. That, my friends, is Hyderabadi Biryani!
A Little History Lesson (Don’t Worry, It’s Tasty!)
Legend has it that Hyderabadi Biryani evolved from the Mughal kitchens, blending Persian and Indian culinary traditions. The Nizams of Hyderabad, known for their lavish lifestyle and refined taste, perfected this dish, adding their own unique spin. It became a symbol of Hyderabadi culture, a testament to their love for good food and grand celebrations.
Let’s Get Cooking!
Preparation Time: 45 minutes
Cooking Time: 60 minutes
Ingredients: The Star Cast of Our Biryani Drama
- For the Mutton (or Chicken) Marinade:
- 750g Mutton (or Chicken), cut into medium-sized pieces
- 2 medium sized onions, finely sliced and fried to a golden brown (called birista)
- 2 tablespoons Adrak-Lahsun Paste (Ginger-Garlic Paste)
- 1 cup Dahi (Yogurt), whisked smoothly
- 2-3 Green Chillies, finely chopped
- 1 tablespoon Lal Mirch Powder (Red Chilli Powder)
- 1 teaspoon Haldi Powder (Turmeric Powder)
- 1 tablespoon Dhaniya Powder (Coriander Powder)
- 1 teaspoon Garam Masala
- 1/2 teaspoon Shah Jeera (Caraway Seeds)
- A pinch of Jafran (Saffron) strands, soaked in 2 tablespoons of warm milk
- 2 tablespoons chopped Pudina (Mint Leaves)
- 2 tablespoons chopped Hara Dhaniya (Coriander Leaves)
- 3 tablespoons Cooking Oil
- Salt to taste
- For the Rice:
- 500g Basmati Rice, soaked in water for at least 30 minutes
- 6-7 cups of Water
- 2 Bay Leaves (Tej Patta)
- 4-5 Green Cardamoms (Elaichi)
- 4-5 Cloves (Laung)
- 1 inch Cinnamon Stick (Dalchini)
- 1 teaspoon Shah Jeera (Caraway Seeds)
- 1 tablespoon Oil
- Salt to taste
- 1 tablespoon Ghee (Clarified Butter) – for layering
- A pinch of Yellow Food Colour (optional) dissolved in 2 tablespoons of water
Step-by-Step Instructions: Let’s Make Magic!
- Marinate the Mutton (or Chicken): In a large bowl, combine the mutton (or chicken) with ginger-garlic paste, yogurt, green chillies, red chilli powder, turmeric powder, coriander powder, garam masala, shah jeera, saffron milk, mint leaves, coriander leaves, fried onions (save some for garnishing), oil, and salt. Mix well, ensuring every piece is coated in the luscious marinade. Cover and refrigerate for at least 2 hours, or preferably overnight for a richer flavor.
-
Parboil the Rice: In a large pot, bring water to a rolling boil. Add bay leaves, cardamom, cloves, cinnamon stick, shah jeera, oil, and salt. Gently add the soaked rice and cook until it’s about 70% done. The rice should still have a slight bite to it. Drain the rice and set aside.
-
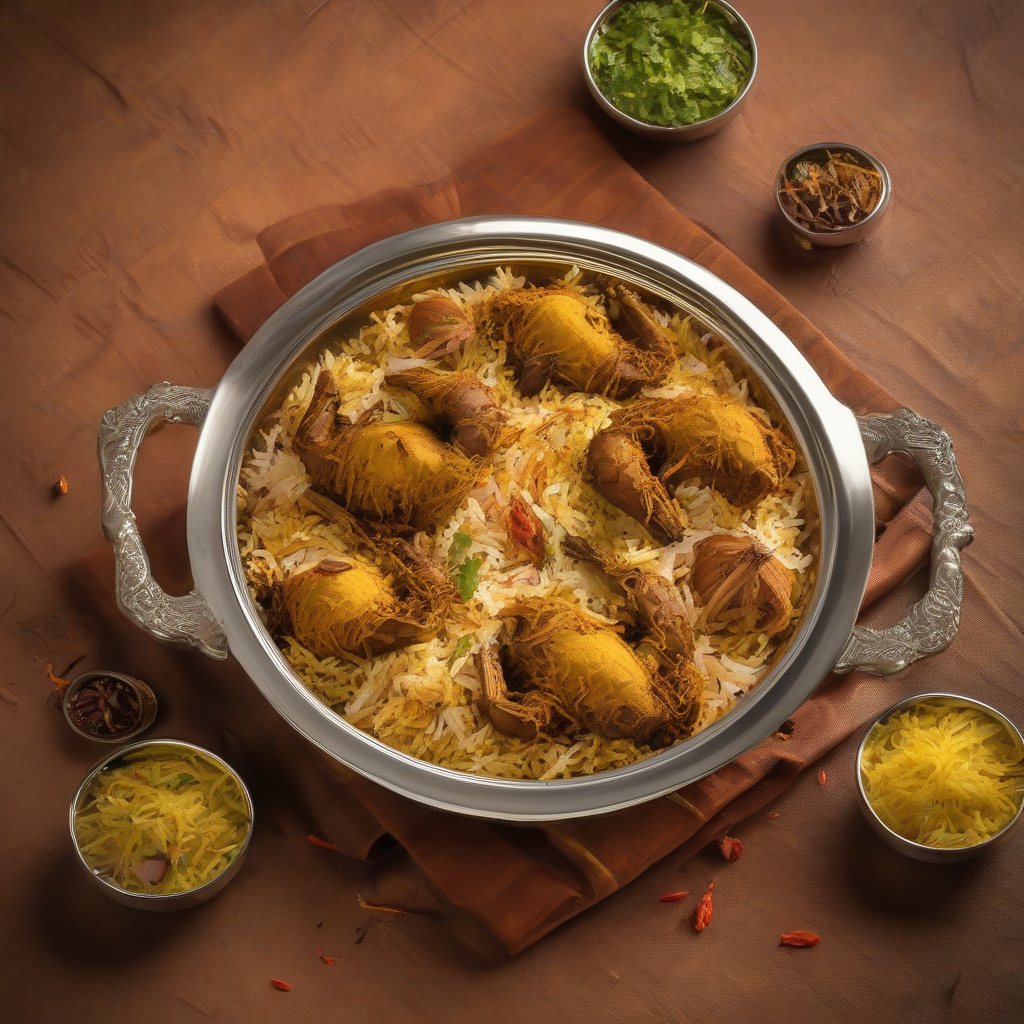
Layering Time: Now comes the fun part! In a heavy-bottomed pot (a “degh” is ideal), start with a layer of the marinated mutton (or chicken). Spread it evenly at the bottom. Next, add a layer of the parboiled rice, spreading it gently over the mutton. Sprinkle some fried onions, chopped coriander, and mint leaves on top. Drizzle a tablespoon of ghee over the rice.
-
Dum Cooking: This is the secret to perfect biryani! Cover the pot tightly with a lid. You can seal the edges with dough to prevent steam from escaping (this is called “dum”). Place the pot on a low flame (or use a tawa or griddle underneath to prevent burning) and cook for about 45-60 minutes. The “dum” allows the flavors to meld together beautifully.
-
The Grand Reveal: After 45-60 minutes, turn off the heat and let the biryani rest for another 10-15 minutes before opening the lid. This allows the steam to settle and the flavors to deepen.
-
Garnish and Serve: Gently fluff the biryani with a fork, being careful not to break the rice grains. Garnish with the remaining fried onions, fresh coriander, and mint leaves. Serve hot!
Tips for a Top-Notch Biryani
- Quality Ingredients: Use the best quality basmati rice and fresh spices for the most authentic flavor.
- Patience is Key: Don’t rush the marinating and dum cooking process. This is where the magic happens!
- Low and Slow: Cook the biryani on a low flame to prevent burning and ensure even cooking.
- Don’t Overcook the Rice: Remember, the rice is only parboiled. It will finish cooking during the dum process.
Biryani Your Way: Different Cooking Methods
- Gas Stove: Follow the instructions above for the traditional dum cooking method.
- Induction Stove: Use a heavy-bottomed pot and adjust the heat settings accordingly.
- Pressure Cooker: Not recommended for traditional dum biryani, as it can overcook the rice.
- Oven: Preheat the oven to 300°F (150°C). Cover the pot tightly with foil and bake for 1-1.5 hours.
- Slow Cooker/Crockpot: Not recommended for traditional dum biryani, as it can overcook the rice.
Nutritional Information (Approximate, per serving)
- Calories: 450-550
- Protein: 25-35g
- Carbohydrates: 50-60g
- Fat: 20-30g
Note: Nutritional information may vary based on specific ingredients and portion sizes.
Serving Suggestions: A Feast for the Senses!
Hyderabadi Biryani is a complete meal in itself, but it pairs beautifully with:
- Raita: A cooling yogurt-based side dish with cucumber, onions, and spices.
- Mirchi ka Salan: A spicy and tangy chilli curry.
- Bagara Baingan: A flavorful eggplant curry.
- Simply a fresh salad.
Now It’s Your Turn!
So there you have it, my friends! The secret to making authentic Hyderabadi Biryani, straight from my kitchen to yours. Don’t be intimidated – it’s easier than you think! Gather your ingredients, follow my instructions, and get ready to impress your family and friends with this royal delicacy.
Try this recipe at home, share it with your loved ones, and let me know how it turns out! Happy cooking!