Meetha Meetha, Dil Ko Bhaaye: Let’s Make Amriti, Bhai!
Namaste doston! And a very warm pranam to all my Mithila folks! Chef Curry Do’pyaza here, back in your kitchens with a sweet treat that’s sure to make your taste buds sing. Today, we’re diving into the world of Amriti, that gloriously orange, crispy, and syrupy sweet that just screams celebration.
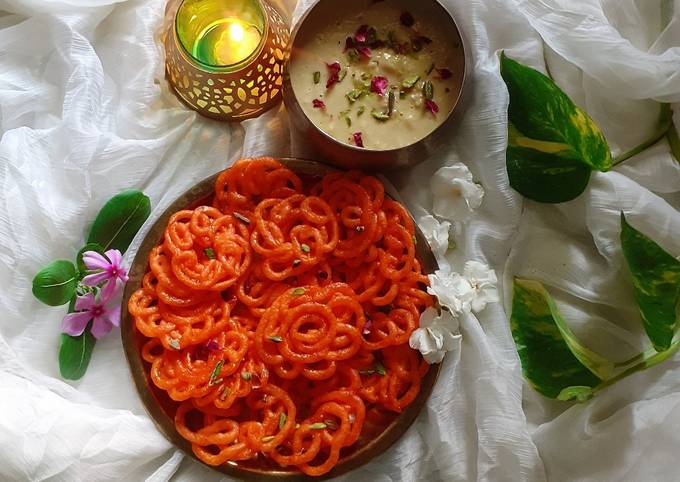
Amriti isn’t just a dessert; it’s an emotion. It’s the taste of joy, the sweetness of togetherness. In Mithila and other parts of Bihar and Uttar Pradesh, you’ll find it gracing weddings, festivals like Teej and Durga Puja, and any occasion that calls for a little meetha (sweetness) in life. It’s a winter favourite, enjoyed with family huddled around a warm fire.
A Little Trip Down Memory Lane
The history of Amriti is as swirly as the dessert itself! It’s believed to have originated in the Mithila region of Bihar, India. Some food historians trace its roots back to the ancient Indian sweet “Kundal,” mentioned in old texts. Over time, it evolved into the beautiful, intricate Amriti we know and love today. Each bite is a piece of history!
Ready to Get Cooking?
Don’t worry, this recipe is easier than you think. Even if you’re a kitchen newbie, I’ll guide you through it step by step.
- Preparation Time: 20 minutes (plus soaking time)
- Cooking Time: 30-40 minutes
What You’ll Need (The Ingredients List)
- For the Batter:
- 1 cup Urad Dal (Split Black Gram, skinned)
- 2 tablespoons Ararot (Arrowroot Powder)
- A pinch of Kesar (Saffron strands) (optional, for that beautiful colour and aroma)
- 1/4 teaspoon Elaichi Powder (Cardamom Powder)
- Water, as needed
- For the Sugar Syrup:
- 1 cup Cheeni (Sugar)
- 1/2 cup Water
- 1/4 teaspoon Elaichi Powder (Cardamom Powder)
- A few drops of Nimbu ka Ras (Lemon Juice) (prevents crystallization)
- A pinch of Kesar (Saffron strands) (optional)
- Tel (Ghee/Cooking Oil) for deep frying
Let’s Make Some Magic: The Cooking Instructions
- Soak the Dal: Wash the urad dal thoroughly and soak it in plenty of water for at least 4-5 hours, or preferably overnight. This is crucial for a smooth batter.
- Grind to Perfection: Drain the dal and grind it to a very fine, smooth paste using a little water. The batter should be thick and fluffy.
- Mix it Up: In a bowl, combine the ground dal paste, ararot, kesar (if using), and elaichi powder. Mix well until everything is incorporated. The batter should have a dropping consistency. If it’s too thick, add a little water. If it’s too thin, add a little more ararot.
- Syrup Time: In a saucepan, combine the cheeni and water. Bring to a boil, stirring until the sugar dissolves completely. Add elaichi powder, kesar (if using), and nimbu ka ras. Simmer for 5-7 minutes, or until the syrup reaches a slightly sticky consistency (one-string consistency). Keep the syrup warm.
- Frying Fun: Heat tel in a deep pan or wok over medium heat. The oil should be hot enough for deep frying but not smoking.
- Shape it Up: This is the tricky part, but don’t worry, practice makes perfect! Traditionally, a cloth with a small hole is used to pipe the batter into concentric circles in the hot oil, forming the Amriti shape. You can also use a piping bag with a small nozzle or even a clean squeeze bottle. Start from the center and move outwards, creating a circular pattern.
- Fry to Golden Glory: Fry the Amritis until they are golden brown and crispy on both sides. Flip them gently to ensure even cooking.
- Syrup Bath: Remove the fried Amritis from the oil and immediately immerse them in the warm sugar syrup. Let them soak for 2-3 minutes, turning them occasionally to ensure they are well coated.
- Serve and Enjoy: Remove the Amritis from the syrup and arrange them on a plate. Garnish with chopped nuts or kesar strands, if desired. Serve warm or at room temperature.
Chef Curry’s Top Tips for Amriti Perfection
- Dal Quality Matters: Use good quality urad dal for the best results.
- Batter Consistency is Key: The batter should be thick enough to hold its shape but thin enough to be piped easily.
- Don’t Overcrowd the Pan: Fry the Amritis in batches to prevent the oil temperature from dropping.
- Keep the Syrup Warm: Warm syrup helps the Amritis absorb the sweetness better.
- Practice Makes Perfect: Don’t be discouraged if your first few Amritis aren’t perfect. Keep practicing, and you’ll get the hang of it!
Cooking Options for the Modern Kitchen
- Gas Stove: The traditional method, works perfectly.
- Induction Stove: Adjust the heat settings carefully to maintain a consistent oil temperature.
- Air Fryer: While not traditional, you can try air frying the Amritis for a healthier option. Brush them with a little oil and air fry at 350°F (175°C) for 8-10 minutes, flipping halfway through. Soak in warm syrup after.
- Microwave: Not recommended for this recipe.
Nutritional Information (Approximate, per serving)
- Calories: 250-300
- Carbohydrates: 40-50g
- Protein: 5-7g
- Fat: 8-12g
Serving Suggestions
- Enjoy Amriti on its own as a sweet treat.
- Serve it with a scoop of vanilla ice cream for a delightful combination of warm and cold.
- Pair it with a cup of hot chai or coffee for the perfect afternoon snack.
- Offer it as a prasad during festivals and religious ceremonies.
Your Turn to Shine!
Now it’s your turn to try this delightful Amriti recipe at home. Don’t be afraid to experiment and put your own spin on it. Share the sweetness with your friends and family, and let the celebrations begin!
Happy cooking, doston! And remember, every dish is a story waiting to be told. What story will you create with your Amriti?