Namaste Doston! Crispy, Crunchy, Chatpata – Let’s Make Namakpara!
Hello my dear food-loving friends! Chef Curry Do’pyaza here, back in your kitchens and hearts with another delightful snack straight from the heart of India. Kem cho? Sab theek thaak? I hope this blog post finds you well and ready to dive into the world of deliciousness. Today, we’re tackling a classic, a timeless treat, a snack that’s as addictive as your favorite Bollywood song: Namakpara!
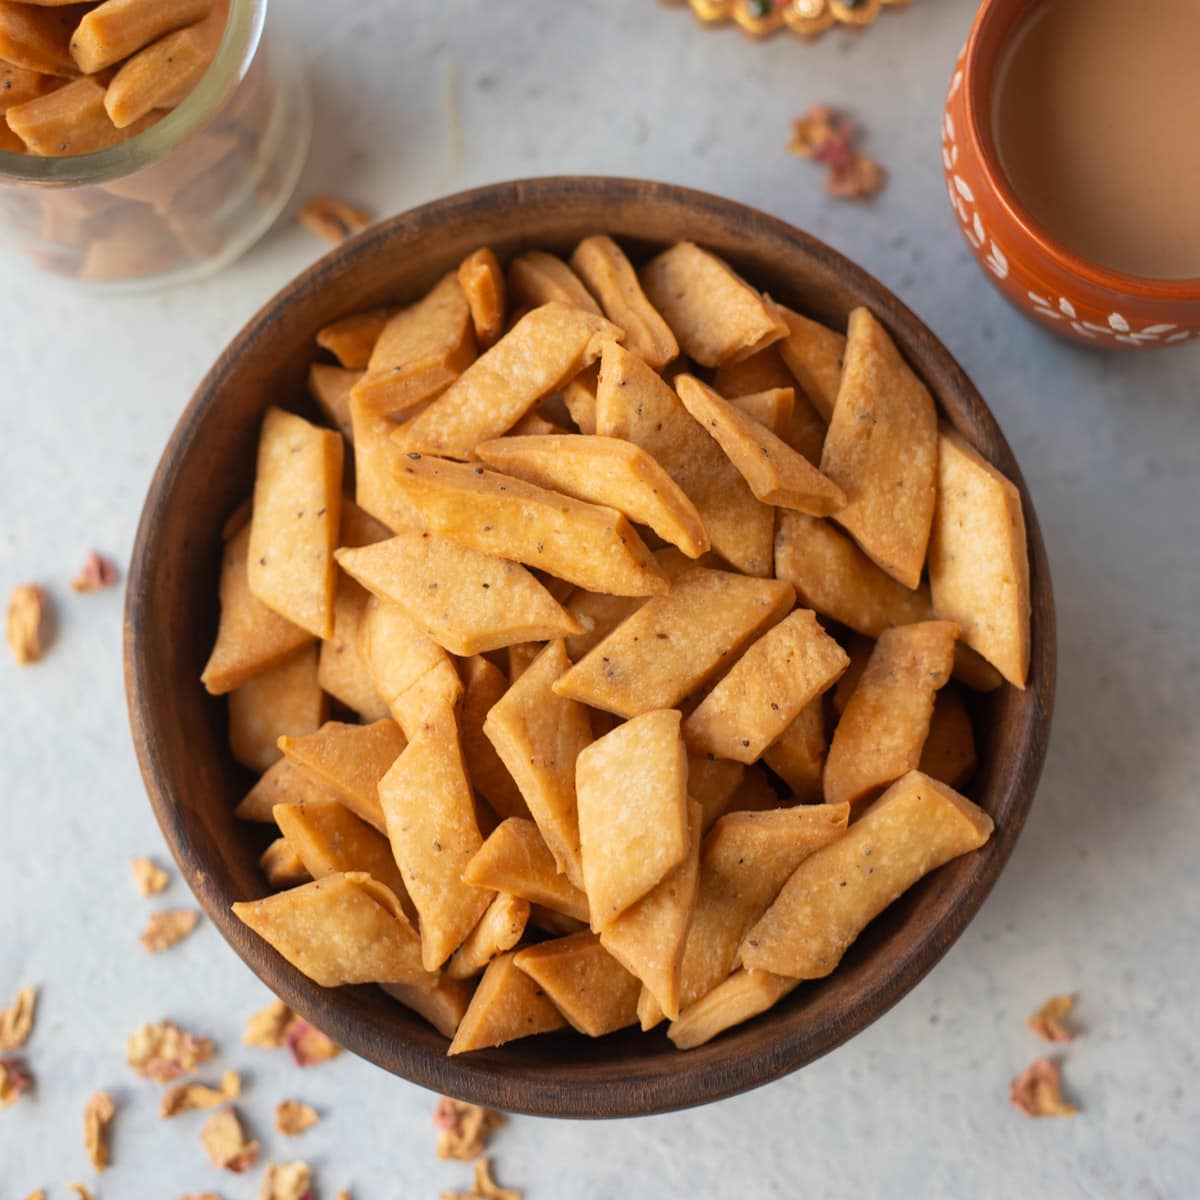
Namakpara! Just the name brings back memories of festive cheer and family gatherings. This savory, diamond-shaped cracker is a staple during Diwali, Holi, and pretty much any occasion where good food and good company come together. It’s the perfect accompaniment to your evening chai (tea), a satisfying munchie for road trips, and a guaranteed crowd-pleaser at any party.
A Little Itihaas (History)
The origins of Namakpara are a bit hazy, like the Delhi air on a winter morning. But, it’s safe to say that this snack has been around for generations, passed down through families and perfected over time. It’s a testament to the simple joys of Indian cooking: taking basic ingredients and transforming them into something truly special.
Tayari ka Samay (Preparation Time): 20 minutes
Pakane ka Samay (Cooking Time): 25 minutes
Samagri (Ingredients):
- 2 cups Maida (All-Purpose Flour)
- 1/4 cup Sooji (Semolina) – This adds a lovely crunch!
- 1/4 cup Tel (Vegetable Oil) – For that perfect khasta (flaky) texture
- 1 teaspoon Ajwain (Carom Seeds) – Adds a unique, aromatic flavor
- 1/2 teaspoon Kalonji (Nigella Seeds) – For a subtle, nutty taste
- 1/2 teaspoon Namak (Salt) – Adjust to your liking
- Water – As needed, to form a stiff dough
- Tel (Vegetable Oil) – For deep frying
Vidhi (Instructions):
- The Dough is the Key: In a large bowl, combine the maida, sooji, tel, ajwain, kalonji, and namak. Rub the oil into the flour mixture with your fingertips until it resembles breadcrumbs. This is crucial for achieving that flaky texture.
- Slowly Add Water: Gradually add water, a little at a time, and knead into a stiff, tight dough. Don’t add too much water at once, or your namakpara will be soggy.
- Resting Time: Cover the dough with a damp cloth and let it rest for at least 20 minutes. This allows the gluten to relax, making it easier to roll out.
- Roll it Out: Divide the dough into equal portions. Roll out each portion into a thin circle (about 1/8 inch thick).
- Diamond Cut: Using a knife or a pizza cutter, cut the circle into diamond shapes. You can also use a cookie cutter for other fun shapes!
- Fry ’em Up: Heat oil in a kadai (wok) or deep frying pan over medium heat. Gently slide the namakpara into the hot oil, a few at a time. Don’t overcrowd the pan!
- Golden Brown Goodness: Fry the namakpara until they are golden brown and crispy, turning occasionally. This usually takes about 5-7 minutes per batch.
- Drain and Cool: Remove the fried namakpara with a slotted spoon and place them on a paper towel-lined plate to drain excess oil. Let them cool completely. They will become even crispier as they cool.
Chef ke Tips (Chef’s Tips):
- Don’t Overcrowd: Fry the namakpara in batches to maintain the oil temperature and ensure even cooking.
- Low and Slow: Fry on medium heat to allow the namakpara to cook through and become crispy. High heat will burn them on the outside while leaving the inside doughy.
- Storage is Key: Store the cooled namakpara in an airtight container. They will stay crispy for several weeks.
Vividh Tarike (Various Methods):
- Gas Stove: Follow the traditional method described above using a kadai on your gas stove.
- Induction Stove: You can easily adapt the gas stove method to an induction stove. Ensure you use a suitable pan for induction cooking.
- Oven: For a healthier option, you can bake the namakpara. Preheat your oven to 350°F (175°C). Place the diamond-shaped pieces on a baking sheet lined with parchment paper and bake for 15-20 minutes, or until golden brown.
- Air Fryer: Air frying is another great way to make namakpara with less oil. Preheat your air fryer to 350°F (175°C). Place the namakpara in a single layer in the air fryer basket and cook for 8-10 minutes, or until golden brown, shaking the basket halfway through.
Poshan Jankari (Nutritional Information):
- Namakpara is primarily a carbohydrate-rich snack.
- It also contains fats from the oil used in frying.
- It’s important to consume it in moderation as part of a balanced diet.
Parosne ka Tarika (Serving Suggestions):
- Serve namakpara with a hot cup of chai or coffee.
- Pair it with pudina chutney (mint chutney) or imli chutney (tamarind chutney) for a burst of flavor.
- Pack it in your lunchbox for a satisfying midday snack.
- Offer it to guests as a delightful welcome treat.
Aapki Bari Hai! (It’s Your Turn!)
So there you have it, folks! My easy-peasy recipe for crispy, crunchy, chatpata Namakpara. Now, it’s your turn to get into the kitchen and try it out. I promise, the aroma of freshly fried namakpara will fill your home with warmth and happiness. Make it, share it with your loved ones, and let the good times roll!
Don’t forget to share your Namakpara adventures with your friends and family. Khush Raho, Mast Raho! (Stay happy, stay healthy!)