Oye Hoye! Pahari Chicken Biryani: A Taste of the Mountains in Your Kitchen!
Namaste and Sat Sri Akal, my food-loving friends! Chef Curry Do-Pyaza here, ready to whisk you away on a culinary journey to the majestic hills with a dish that’s close to my heart: Pahari Chicken Biryani!
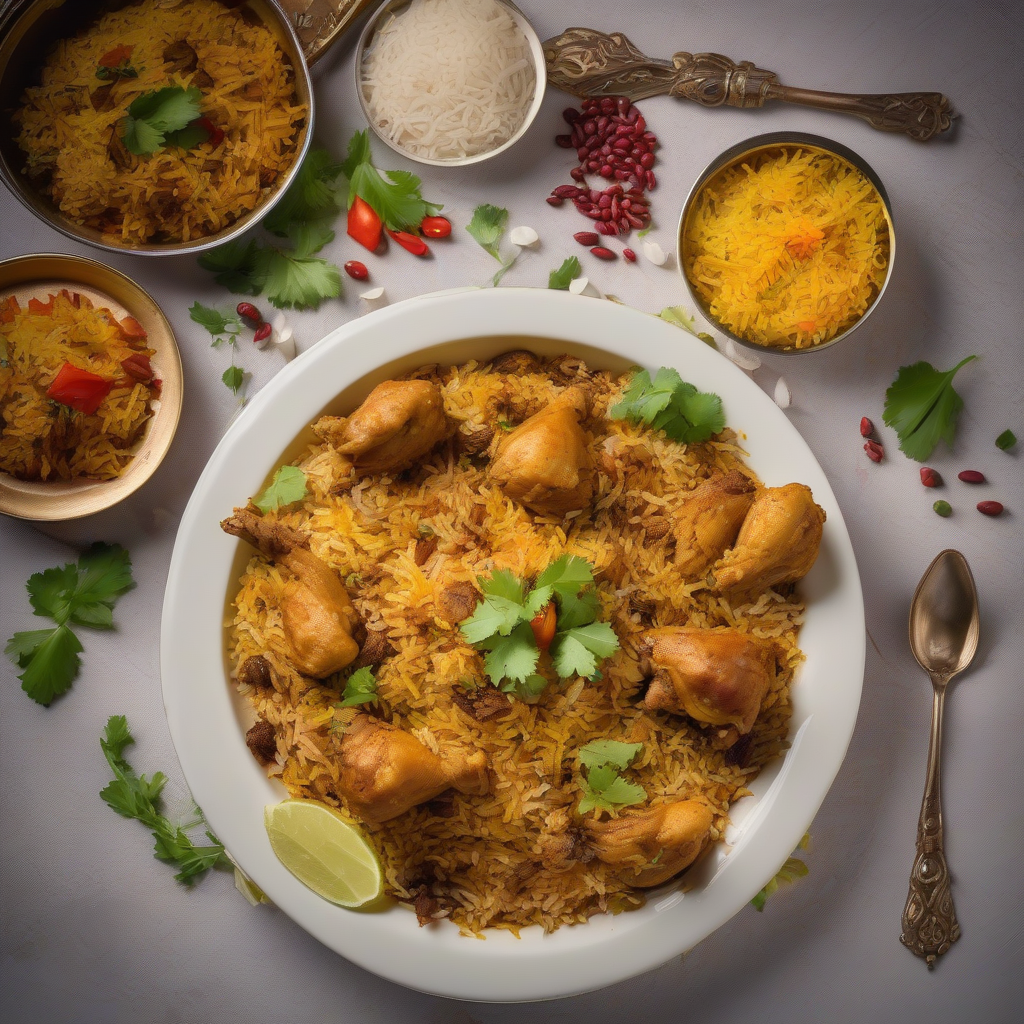
This isn’t just any biryani; it’s a fragrant, flavorful hug in a bowl, reminiscent of cozy evenings spent in the mountains. Think crackling fireplaces, crisp mountain air, and the aroma of spices swirling through the valleys. Ah, good times!
When Do We Feast on This Beauty?
Pahari Chicken Biryani is a star during the cooler months, especially around Diwali and Lohri. The warm spices and hearty chicken make it the perfect comfort food for those chilly evenings. It’s also a festive favourite for family gatherings and celebrations, bringing everyone together with its irresistible aroma and taste.
A Little History Lesson (Don’t worry, it’s short!)
Biryani, as you know, has royal roots, originating in Persia and making its way to India with the Mughals. This Pahari version, however, is a local adaptation, infused with the unique spices and flavours of the Himalayan region. Each family has their own secret twist, passed down through generations. My version? Well, let’s just say it has a little extra tadka of love!
Ready to Cook? Let’s Get Started!
- Preparation Time: 30 minutes
- Cooking Time: 45 minutes
What You’ll Need (The Star Cast):
- Chicken: 1 kg, cut into medium-sized pieces
- Basmati Rice: 500 grams, soaked in water for 30 minutes
- Onions (Pyaaz): 2 large, thinly sliced
- Tomatoes (Tamatar): 2 medium, finely chopped
- Ginger-Garlic Paste (Adrak-Lahsun Paste): 2 tablespoons
- Green Chillies (Hari Mirch): 3-4, slit (adjust to your spice preference!)
- Yogurt (Dahi): 1 cup, whisked
- Turmeric Powder (Haldi): 1 teaspoon
- Red Chilli Powder (Lal Mirch): 1 teaspoon (or more, if you like it fiery!)
- Coriander Powder (Dhania Powder): 2 tablespoons
- Garam Masala: 1 teaspoon
- Cumin Seeds (Jeera): 1 teaspoon
- Bay Leaves (Tej Patta): 2
- Cinnamon Stick (Dalchini): 1 inch
- Cardamom Pods (Elaichi): 4-5
- Cloves (Laung): 4-5
- Saffron Strands (Kesar): A pinch, soaked in 2 tablespoons of warm milk
- Fresh Coriander Leaves (Hara Dhaniya): A handful, chopped
- Fresh Mint Leaves (Pudina): A handful, chopped
- Ghee (Clarified Butter): 3 tablespoons
- Oil: 2 tablespoons
- Salt: To taste
Let’s Cook! (Step-by-Step):
- Marinate the Chicken: In a large bowl, combine the chicken with ginger-garlic paste, yogurt, turmeric powder, red chilli powder, coriander powder, garam masala, and salt. Mix well and let it marinate for at least 30 minutes (or even better, for a couple of hours in the fridge!).
- Sauté the Aromatics: Heat ghee and oil in a large, heavy-bottomed pot or handi. Add cumin seeds, bay leaves, cinnamon stick, cardamom pods, and cloves. Let them sizzle for a few seconds until fragrant.
- Brown the Onions: Add the sliced onions and sauté them until they turn golden brown. This is key for a rich flavour, so be patient!
- Add the Tomatoes and Green Chillies: Add the chopped tomatoes and slit green chillies. Cook until the tomatoes are soft and mushy.
- Cook the Chicken: Add the marinated chicken to the pot and cook over medium heat until it’s browned on all sides.
- Layer the Rice: Drain the soaked rice and spread it evenly over the chicken. Don’t stir!
- Add Water: Pour in enough water to cover the rice by about an inch. Add salt to taste.
- Simmer and Dum: Bring the water to a boil, then reduce the heat to low, cover the pot tightly with a lid, and let it simmer for 20-25 minutes, or until the rice is cooked and the water is absorbed. This “dum” cooking is what makes the biryani so special!
- Garnish and Serve: Gently fluff the rice with a fork. Drizzle the saffron milk over the biryani. Garnish with fresh coriander and mint leaves. Serve hot!
Chef’s Tips for a Perfect Biryani:
- Quality Rice is Key: Use good quality aged Basmati rice for the best flavour and texture.
- Don’t Overcook the Rice: Keep a close eye on the rice while it’s simmering. You want it to be cooked through but not mushy.
- The Dum is Crucial: Ensure the pot is tightly sealed during the dum cooking process to trap the steam and infuse the biryani with flavour. You can even use a layer of dough to seal the lid for extra flavour.
Biryani Your Way: Different Cooking Methods
- Gas Stove: Follow the steps above using a heavy-bottomed pot.
- Induction Stove: Use a compatible pot and adjust the heat settings accordingly.
- Pressure Cooker: Reduce the cooking time significantly. Cook for 1 whistle on high heat, then reduce the heat to low and cook for another 5-7 minutes. Be careful not to overcook the rice!
- Oven: Preheat the oven to 350°F (175°C). After layering the rice, cover the pot tightly with foil and bake for 30-40 minutes.
- Slow Cooker/Crockpot: This method requires some adjustments. Sauté the onions and chicken separately, then layer everything in the slow cooker. Add just enough water to cover the rice. Cook on low for 3-4 hours.
- Microwave and Air Fryer: Not recommended for authentic biryani taste.
Nutritional Information (Approximate, per serving):
- Calories: 450-550
- Protein: 30-40g
- Carbohydrates: 50-60g
- Fat: 20-30g
Note: Nutritional values may vary based on specific ingredients and portion sizes.
Serving Suggestions:
Pahari Chicken Biryani is delicious on its own, but it’s even better with:
- Raita: A cooling yogurt dip with cucumber and mint.
- Mirchi ka Salan: A spicy chilli and peanut curry.
- Pickle (Achaar): For that extra zing!
Time to Get Cooking!
So there you have it, folks! My recipe for Pahari Chicken Biryani. I hope you try this recipe at home and share the joy with your friends and family. Remember, cooking is an act of love, so pour your heart into it, and the results will be magical!
Happy cooking, and until next time, keep those pots simmering and those spices singing!