Bread Bajji Sandwich: Your New Favourite Snack, Yaar!
Namaste Dosto! Kem cho? As you all know, it’s your friendly neighbourhood Chef Curry Do’pyaza here, ready to spice up your life with another delicious recipe. Today, we’re diving into the wonderfully crispy and utterly satisfying world of Bread Bajji Sandwich!
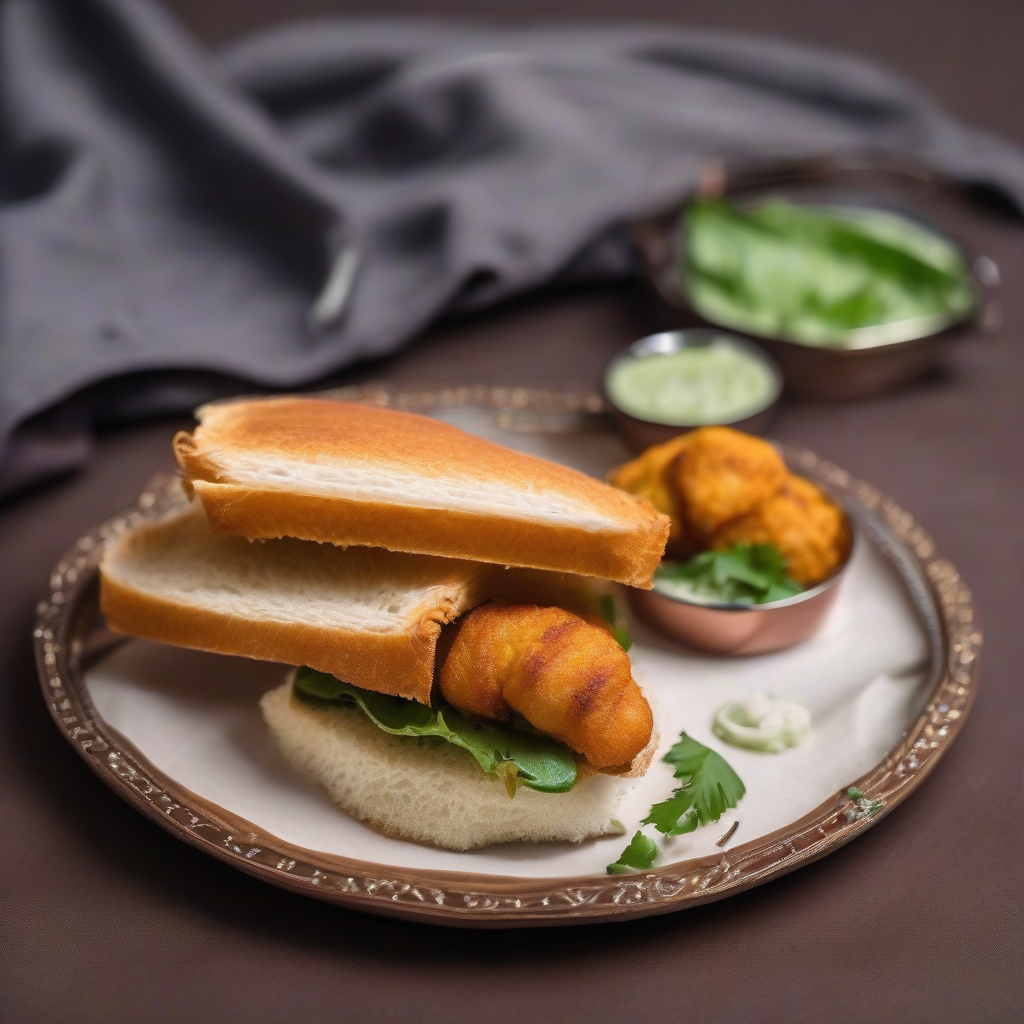
This isn’t just any sandwich; it’s a symphony of textures and flavors that will make your taste buds sing. Think crispy, golden-brown bread on the outside, and a flavorful, spiced potato filling on the inside. Perfect for a quick snack, a light meal, or even a fun party appetizer.
When Do We Feast on Bread Bajji?
Bread Bajji is a versatile dish, enjoyed across India. It’s especially popular during the monsoon season when the cool weather calls for something hot and crispy. You’ll often find it at street food stalls, fairs, and even as a quick snack during festive occasions like Diwali, Holi, and even during Ganesh Chaturthi celebrations in some parts of the country. It’s also a fantastic treat for those unexpected guests or a lazy Sunday afternoon.
A Little Dip into History
The origin of Bread Bajji, like many beloved street foods, is a bit hazy. But the basic idea is simple: take readily available ingredients (bread, potatoes, spices), and transform them into something extraordinary. It’s a testament to Indian ingenuity and our love for delicious, affordable food! The sandwich version is a modern twist, adding an extra layer of deliciousness and convenience.
Let’s Get Cooking!
- Preparation Time: 20 minutes
- Cooking Time: 25 minutes
What You Need (Ingredients):
- For the Filling:
- 3 medium-sized Aloo (Potatoes), boiled, peeled, and mashed
- 1 medium-sized Pyaaz (Onion), finely chopped
- 1-2 Hari Mirch (Green Chillies), finely chopped (adjust to your spice level)
- 1 inch Adrak (Ginger), grated
- 1/2 teaspoon Haldi Powder (Turmeric Powder)
- 1/2 teaspoon Lal Mirch Powder (Red Chilli Powder)
- 1/2 teaspoon Dhaniya Powder (Coriander Powder)
- 1/4 teaspoon Amchur Powder (Dry Mango Powder)
- 1/4 teaspoon Garam Masala
- 2 tablespoons Hara Dhaniya (Fresh Coriander Leaves), chopped
- Salt to taste
- For the Batter:
- 1 cup Besan (Gram Flour)
- 1/4 cup Chawal ka Atta (Rice Flour) – for extra crispiness
- 1/4 teaspoon Ajwain (Carom Seeds)
- 1/4 teaspoon Haldi Powder (Turmeric Powder)
- 1/4 teaspoon Lal Mirch Powder (Red Chilli Powder)
- Salt to taste
- Water, as needed to make a smooth batter
- Other:
- 6-8 slices of Bread (White or Brown, your choice!)
- Oil for deep frying
Step-by-Step Instructions:
- Make the Spicy Filling: In a bowl, mix the mashed potatoes, chopped onion, green chilies, grated ginger, turmeric powder, red chili powder, coriander powder, dry mango powder, garam masala, chopped coriander leaves, and salt. Mix it all together until you have a flavorful, even mixture. Taste and adjust the seasonings as needed. This is where you can really make it your own!
-
Assemble the Sandwiches: Take two slices of bread and generously spread the potato mixture on one slice. Top it with the other slice, creating a delicious potato-filled sandwich. You can cut the sandwich into triangles or squares, depending on your preference.
-
Prepare the Golden Batter: In a separate bowl, whisk together the gram flour, rice flour, carom seeds, turmeric powder, red chili powder, and salt. Gradually add water, whisking continuously, until you have a smooth, lump-free batter that is neither too thick nor too thin. It should coat the back of a spoon easily.
-
Fry to Perfection: Heat oil in a deep frying pan or kadhai over medium heat. Make sure the oil is hot enough – test it by dropping a tiny bit of batter into the oil; it should sizzle and rise to the surface.
-
Dip and Fry: Dip each sandwich piece into the batter, ensuring it’s completely coated. Gently drop the batter-coated sandwich into the hot oil. Fry until golden brown and crispy on both sides, about 3-4 minutes per side. Don’t overcrowd the pan; fry in batches.
-
Drain and Serve: Remove the fried bread bajji sandwiches from the oil and place them on a plate lined with paper towels to drain excess oil. Serve hot and crispy!
Chef Curry’s Top Tips:
- Don’t Overload the Filling: Too much filling can make the sandwich soggy and difficult to fry.
- Batter Consistency is Key: The batter should be thick enough to coat the bread but thin enough to fry evenly.
- Hot Oil is Crucial: Frying in hot oil ensures a crispy exterior and prevents the bajji from becoming oily.
- Spice it Up: Adjust the amount of green chilies and red chili powder to your preferred spice level.
- Add a Tangy Twist: A squeeze of lemon juice over the filling adds a refreshing zing.
Different Ways to Cook Your Bread Bajji:
- Gas Stove: The classic method, perfect for achieving that golden-brown crispiness.
- Induction Stove: Works just as well as a gas stove, offering precise temperature control.
- Air Fryer: For a healthier, less oily version, you can air fry the bread bajji at 375°F (190°C) for about 10-12 minutes, flipping halfway through. Spray lightly with oil for best results.
- Oven: Bake at 400°F (200°C) for 15-20 minutes, flipping halfway through, for a baked version.
Nutritional Information (Approximate, per serving):
- Calories: 250-300
- Protein: 8-10g
- Carbohydrates: 30-35g
- Fat: 12-15g
Serving Suggestions:
- Serve hot with your favorite chutney, such as mint-coriander chutney, tamarind chutney, or tomato ketchup.
- Enjoy it with a hot cup of chai (tea) for the ultimate comfort food experience.
- Garnish with a sprinkle of chaat masala for an extra burst of flavor.
Time to Get Cooking!
So there you have it, folks! A simple, delicious, and satisfying Bread Bajji Sandwich recipe that’s sure to become a family favourite. Now, go on, get into the kitchen, and create some magic! And remember, the best recipes are the ones you share with loved ones.
Happy Cooking, and until next time, keep the spice alive!