Seedai So Sweet: A Crunchy Treat from Grandma’s Kitchen!
Namaste Doston! Vanakkam Makkalae! Kem cho mitron! (Greetings friends!)
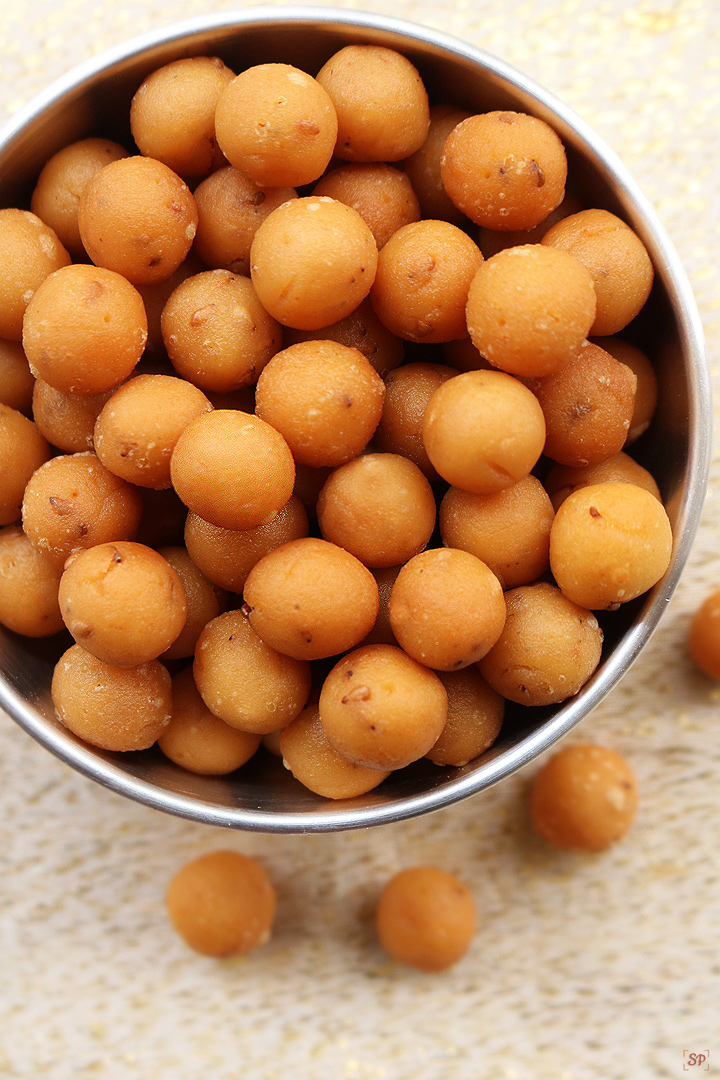
Chef Curry Do’pyaza here, back with another recipe that will transport you straight to your grandmother’s loving embrace. Today, we are diving into the delightful world of Seedai, those tiny, crispy, and utterly addictive spheres of deliciousness.
Seedai is a beloved snack, especially in Tamil Nadu and other parts of South India. It is a star during festive occasions like Krishna Jayanthi (Lord Krishna’s Birthday), Diwali (Festival of Lights), and even during weddings and other joyous celebrations. These golden orbs are often made in large batches, shared with neighbours, and devoured with gusto. The aroma of freshly fried Seedai is simply intoxicating!
A Little History Lesson
No one truly knows the exact origin of Seedai, but it is believed to be a traditional snack passed down through generations. Each family has its own unique twist, its own secret ingredient that makes their Seedai the best. It’s a testament to the enduring power of home cooking and the love that goes into every bite.
Let’s Get Cooking!
Preparation Time: 20 minutes (plus soaking time)
Cooking Time: 30 minutes
Ingredients:
- Arisi Maavu (Rice Flour): 1 cup (Use a fine, good quality rice flour)
- Urad Dal Maavu (Urad Dal Flour/Black Gram Flour): 2 tablespoons (Roasted lightly and ground)
- Vella Ellu (White Sesame Seeds): 1 tablespoon
- Perungayam (Asafoetida): A pinch (Adds a unique savory flavor)
- Uppu (Salt): To taste
- Venna (Butter): 1 tablespoon (Softened)
- Thengai Pal (Coconut Milk): Approximately 1/4 cup (For binding the dough)
- Ennai (Oil): For deep frying
Instructions:
- Soak the Rice: Wash the rice flour and soak it in water for 1-2 hours. Drain the water completely. Spread the rice flour on a clean cloth and let it dry for 15-20 minutes. This step is crucial for achieving the right texture.
- Combine the Dry Ingredients: In a large mixing bowl, combine the rice flour, urad dal flour, sesame seeds, asafoetida, and salt. Mix everything thoroughly.
- Add the Butter: Incorporate the softened butter into the dry ingredients. Rub it in with your fingers until the mixture resembles breadcrumbs. This will make the Seedai nice and flaky.
- Knead the Dough: Gradually add the coconut milk, a little at a time, and knead the mixture into a smooth, non-sticky dough. The dough should be pliable and easy to shape.
- Shape the Seedai: Take a small portion of the dough (about the size of a marble) and roll it between your palms to form a smooth, round ball. Repeat this process until all the dough is used up.
- Deep Fry: Heat oil in a deep frying pan or wok over medium heat. Gently drop a few Seedai at a time into the hot oil. Do not overcrowd the pan.
- Fry to Perfection: Fry the Seedai until they turn golden brown and crispy, turning them occasionally to ensure even cooking. This should take about 5-7 minutes per batch.
- Drain and Cool: Remove the fried Seedai from the oil using a slotted spoon and drain them on a paper towel to remove any excess oil. Let them cool completely before storing them in an airtight container.
Tips for the Best Seedai:
- Rice Flour Quality: The quality of the rice flour is paramount. Ensure it is fresh and finely ground.
- Dough Consistency: The dough should be smooth and pliable. If it is too dry, add a little more coconut milk. If it is too wet, add a little more rice flour.
- Oil Temperature: Maintain a medium heat while frying. Too high a heat will burn the Seedai on the outside while leaving them uncooked on the inside. Too low a heat will make them absorb too much oil.
- Patience is Key: Frying Seedai requires patience. Don’t rush the process. Allow them to cook slowly and evenly to achieve that perfect golden-brown color and crispy texture.
Cooking Variations:
- Gas Stove/Induction Stove: Follow the instructions above for deep frying in a pan or wok.
- Air Fryer: Preheat your air fryer to 350°F (175°C). Lightly brush the Seedai with oil and air fry for 10-12 minutes, or until golden brown and crispy, flipping halfway through.
- Oven: Preheat your oven to 350°F (175°C). Place the Seedai on a baking sheet lined with parchment paper. Bake for 15-20 minutes, or until golden brown and crispy, flipping halfway through. (Note: Oven-baked Seedai may not be as crispy as deep-fried or air-fried ones.)
Nutritional Information (Approximate, per serving):
- Calories: 150-200
- Fat: 8-12g
- Carbohydrates: 15-20g
- Protein: 2-3g
(Note: Nutritional information can vary based on specific ingredients and portion sizes.)
Serving Suggestions:
- Enjoy Seedai as a standalone snack with a cup of chai or coffee.
- Serve them as part of a festive platter along with other traditional Indian sweets and savories.
- Pack them in lunchboxes for a tasty and satisfying treat.
A Humble Request:
I urge you to try this recipe at home. Feel the joy of creating something delicious and sharing it with your loved ones. Let the aroma of homemade Seedai fill your home with warmth and happiness. Share the recipe with your friends and family, so they too can experience the magic of this traditional Indian snack.
Until next time, happy cooking!
Yours truly,
Chef Curry Do’pyaza.