Roti Riot: Let’s Get This Chapati Rolling, Yaar!
Namaste, Salaam, and Sat Sri Akal, food lovers! Chef Curry Do’pyaza here, back in your kitchens (and hearts!) with a staple so fundamental, so utterly Indian, it’s practically woven into our DNA: Roti!
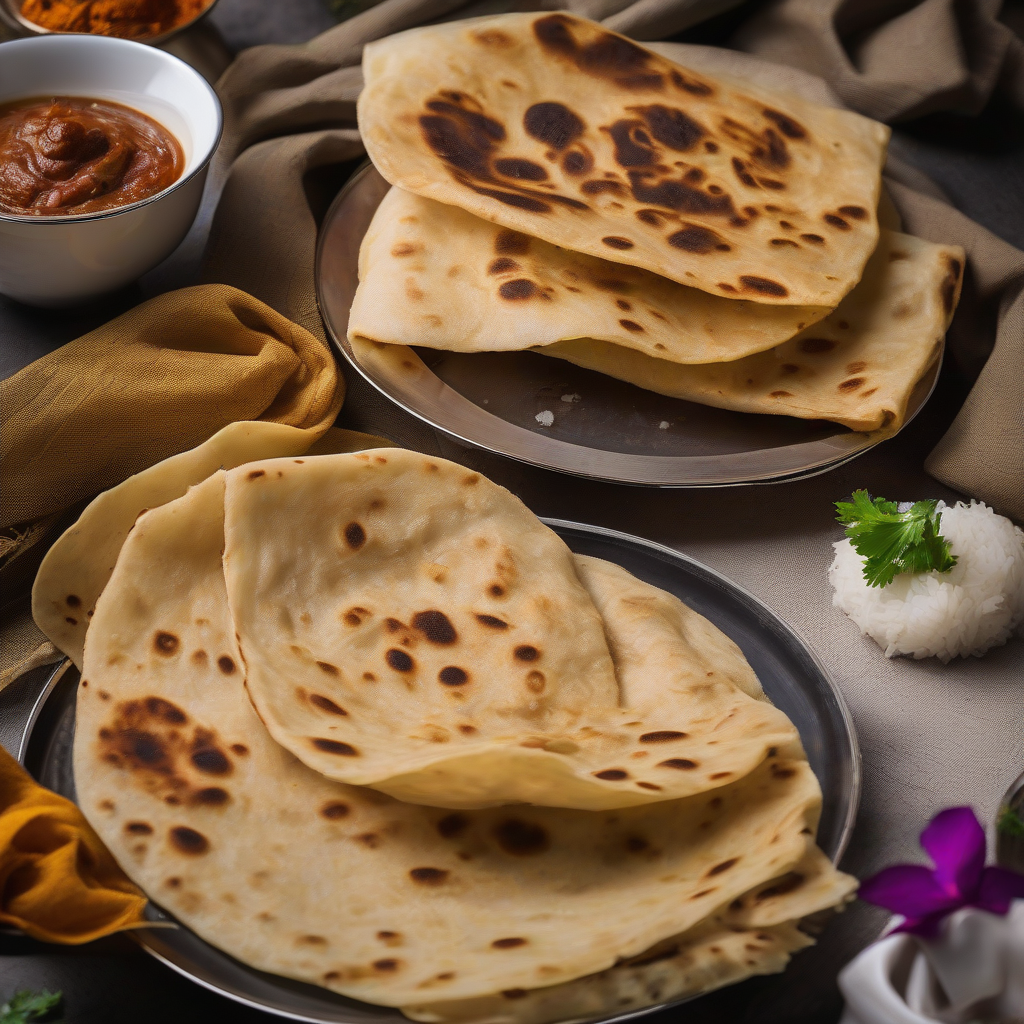
Think of roti, and you think of home. You think of Maa’s loving hands, the gentle sizzle on the tava (flat griddle), and the comforting aroma that fills the air. It’s more than just bread; it’s a symbol of nourishment, family, and the simple joys of life.
When Do We Feast on Roti?
Roti isn’t just for any old Tuesday. It’s a star player during Diwali, when families gather for grand feasts. It graces the table during Holi, complementing the vibrant colors and festive spirit. It’s an everyday essential in most Indian households, served with delectable dals (lentil stews), flavorful subzis (vegetable dishes), and spicy curries. From the scorching heat of summer to the cool breeze of winter, roti is a year-round companion.
A Whiff of History
The story of roti is as old as civilization itself. It traces back thousands of years to the Indus Valley Civilization, where early forms of unleavened bread were baked on hot stones. Over time, the recipe evolved, becoming the soft, pliable roti we know and love today. It’s a testament to the ingenuity of our ancestors and their ability to create something extraordinary from simple ingredients.
Let’s Get Cooking!
- Preparation Time: 15 minutes
- Cooking Time: 20 minutes
Ingredients You’ll Need:
- Atta (Whole Wheat Flour): 2 cups (This is the heart and soul of our roti!)
- Pani (Water): Approximately 1 cup (Use warm water for extra soft rotis)
- Tel (Oil) or Ghee (Clarified Butter): 1 tablespoon (For that delightful, melt-in-your-mouth texture)
- Namak (Salt): A pinch (Just a tiny pinch to enhance the flavor)
Step-by-Step Guide:
- Mixing the Dough: In a large bowl, combine the atta and salt. Gradually add the warm water, mixing with your hands until a soft, pliable dough forms. Don’t add all the water at once; you want a smooth, elastic dough, not a sticky mess.
- Kneading is Key: Now, the fun part! Knead the dough for about 8-10 minutes. This develops the gluten, giving your rotis that lovely, chewy texture. Add the oil or ghee during the last few minutes of kneading for extra softness.
- Resting Time: Cover the dough with a damp cloth and let it rest for at least 15 minutes. This allows the gluten to relax, making the rotis easier to roll.
- Rolling Out the Magic: Divide the dough into small, equal-sized balls (about the size of a golf ball). On a lightly floured surface, roll each ball into a thin, circular disc. Aim for a uniform thickness to ensure even cooking.
- Tava Time: Heat a tava (or a flat griddle) over medium-high heat. Place the rolled-out roti on the hot tava and cook for about 30 seconds on each side, until small bubbles start to appear.
- The Puffing Finale: Now, either directly on the flame of your gas stove (using tongs!) or back on the hot tava, gently puff up the roti. This creates those beautiful, airy pockets that make roti so irresistible. If using the tava, press gently around the edges with a clean cloth to encourage puffing.
- Ghee-licious Touch: Brush the cooked roti with a little ghee or oil for added flavor and softness.
Chef Curry’s Top Tips:
- Warm Water Works Wonders: Using warm water makes the dough softer and more pliable.
- Knead Like You Mean It: Proper kneading is crucial for soft rotis.
- Don’t Overcook: Overcooked rotis become hard and brittle.
- Ghee is Your Friend: A touch of ghee elevates the flavor and texture.
Roti, Your Way:
- Gas Stove: The classic method! Perfect for achieving that signature puffed-up roti.
- Induction Stove: Works just as well as a gas stove.
- Oven: You can bake rotis in the oven at a high temperature (around 450°F or 230°C) for a few minutes on each side. This gives them a slightly crispier texture.
- Microwave: Not ideal for achieving the best texture, but you can warm up pre-cooked rotis in the microwave.
- Air Fryer: Not recommended for making rotis from scratch.
- Pressure Cooker, Slow Cooker, Crockpot: These appliances are not suitable for making rotis.
Nutritional Goodness (Approximate per Roti):
- Calories: 70-80
- Carbohydrates: 15-18g
- Protein: 2-3g
- Fiber: 2-3g
Serving Suggestions Fit for a King (or Queen!):
- Dal Makhani: A creamy, buttery lentil dish.
- Chole Bhature: Spicy chickpeas with fried bread (a Punjabi favorite!).
- Palak Paneer: Spinach and cottage cheese curry.
- Baingan Bharta: Smoked eggplant mash.
- Chicken Curry: A classic Indian comfort food.
Your Turn to Shine!
So there you have it! The simple, soulful, and utterly satisfying recipe for roti. Now, go forth and create your own roti riot in your kitchen. Experiment with different flours, add herbs and spices, and make it your own.
Don’t keep this deliciousness to yourself! Share your homemade rotis with your friends and family. Let them experience the joy of freshly made Indian bread. Happy cooking, and remember, food is love!