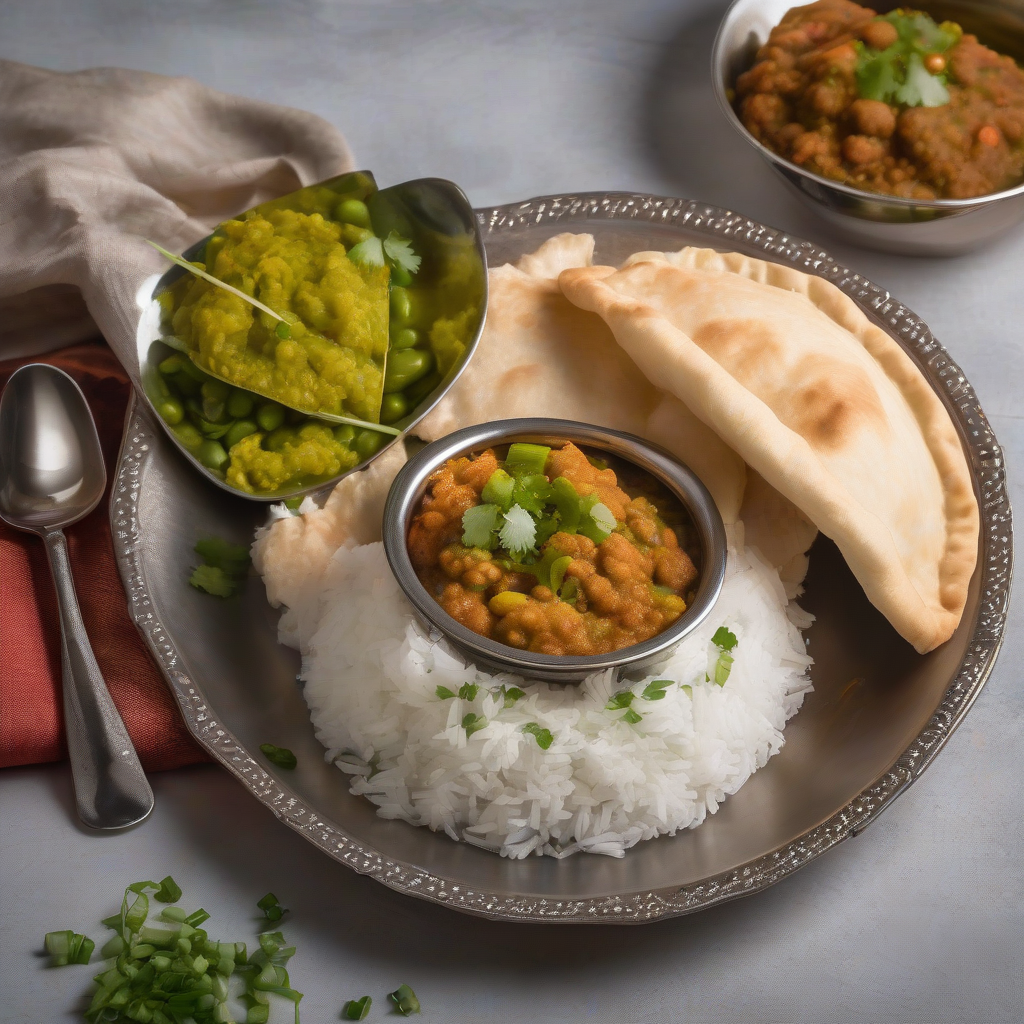
Aye Hai! Garma Garam Poori Aur Chatpata Keema Matar – A Perfect Desi Combo!
Namaste Doston! And a very warm Kem Chho and Assalam Walekum to all my lovely readers! Chef Curry Do’pyaza here, back with another dish that will transport you straight to the bustling streets of India, or maybe even your loving grandmother’s kitchen!
Today, we are diving into a classic Indian pairing that is as comforting as it is delicious: Poori with Keema Matar. This is not just food; it’s an experience, a memory, a burst of flavors that dance on your tongue.
When Do We Eat This Deliciousness?
This dynamic duo is a crowd-pleaser for many occasions. Think of those joyous festive mornings like Diwali, Holi, or even a celebratory Eid breakfast. It’s also perfect for a special Sunday brunch with family, or a simple yet satisfying weeknight dinner. This dish is a versatile star, shining bright whenever you need a dose of pure, unadulterated comfort.
A Little Trip Down Memory Lane
Poori, that golden, puffed-up bread, has ancient roots in the Indian subcontinent. It’s been a staple for centuries, enjoyed by kings and commoners alike. Keema, minced meat cooked with aromatic spices, has its own rich history, influenced by Persian and Central Asian cuisines. The combination of Poori and Keema Matar is a beautiful marriage of these culinary traditions, a testament to India’s diverse and flavorful heritage.
Let’s Get Cooking!
Preparation Time: 25 minutes
Cooking Time: 45 minutes
Ingredients – The Magical List:
For the Fluffy Pooris:
- 2 cups Gehun ka Atta (Whole Wheat Flour)
- 1 tbsp Sooji (Semolina) – This adds a lovely crispness!
- 1 tsp Ajwain (Carom Seeds) – For that distinct, digestive-friendly flavor!
- 1/2 tsp Namak (Salt)
- 2 tbsp Tel (Vegetable Oil)
- Lukewarm Pani (Water) – For kneading
- Tel (Vegetable Oil) – For frying
For the Zesty Keema Matar:
- 500g Mutton Keema (Minced Mutton) – You can also use Chicken Keema for a lighter option.
- 1 cup Matar (Green Peas) – Fresh or frozen, both work wonders!
- 2 medium Pyaz (Onions), finely chopped
- 1 tbsp Adrak-Lahsun ka Paste (Ginger-Garlic Paste)
- 2 medium Tamatar (Tomatoes), finely chopped
- 2-3 Hari Mirch (Green Chilies), finely chopped – Adjust to your spice level!
- 1 tsp Lal Mirch Powder (Red Chili Powder)
- 1 tsp Haldi Powder (Turmeric Powder)
- 1 tsp Dhaniya Powder (Coriander Powder)
- 1/2 tsp Garam Masala
- 2 tbsp Tel (Vegetable Oil)
- Hara Dhaniya (Fresh Coriander Leaves), chopped – For garnishing
- Namak (Salt) to taste
Step-by-Step: From Kitchen Novice to Culinary Rockstar!
Poori Power:
- Dough Time: In a large bowl, combine the wheat flour, semolina, carom seeds, salt, and oil. Mix well.
- Knead It: Gradually add lukewarm water and knead into a smooth, firm dough. Cover it with a damp cloth and let it rest for at least 20 minutes. This allows the gluten to relax, resulting in softer pooris.
- Roll ‘Em Out: Divide the dough into small, equal-sized balls. Roll each ball into a small, circular disc, about 3-4 inches in diameter.
- Fry ‘Em Up: Heat oil in a deep frying pan or wok over medium-high heat. Gently slide a poori into the hot oil.
- Puff Perfection: Using a slotted spoon, gently press down on the poori. It should puff up beautifully! Fry until golden brown on both sides.
- Drain and Serve: Remove the poori from the oil and place it on a paper towel-lined plate to drain excess oil.
Keema Magic:
- Sauté the Aromatics: Heat oil in a pan or pot over medium heat. Add the chopped onions and sauté until golden brown.
- Ginger-Garlic Goodness: Add the ginger-garlic paste and sauté for another minute until fragrant.
- Tomato Tango: Add the chopped tomatoes and green chilies. Cook until the tomatoes soften and the oil starts to separate.
- Spice It Up: Add the red chili powder, turmeric powder, coriander powder, and salt. Sauté for a minute until the spices release their aroma.
- Keema Kickoff: Add the minced mutton and cook, breaking it up with a spoon, until it changes color.
- Simmer Down: Add 1/2 cup of water, cover, and simmer for about 15-20 minutes, or until the mutton is cooked through.
- Pea Power: Add the green peas and cook for another 5-7 minutes, or until the peas are tender.
- Garam Masala Grand Finale: Stir in the garam masala and cook for a minute.
- Garnish and Serve: Garnish with fresh coriander leaves.
Chef Curry’s Top Tips for Culinary Nirvana:
- Poori Perfection: Make sure the oil is hot enough before frying the pooris. This is key to getting them to puff up properly.
- Keema Flavor Bomb: Don’t be afraid to experiment with different spices! A pinch of cumin powder or a dash of black pepper can add extra depth of flavor.
- Rest the Dough: Resting the poori dough is crucial for soft and fluffy pooris.
Cooking it Your Way – The Multi-Platform Recipe:
- Gas Stove: Follow the recipe as described above.
- Induction Stove: Adjust the heat settings accordingly.
- Pressure Cooker (Keema only): Sauté the onions and spices in the pressure cooker. Add the keema and water, and pressure cook for 3-4 whistles. Release the pressure and add the peas. Cook for another 2 minutes.
- Slow Cooker/Crockpot (Keema only): Sauté the onions and spices in a pan. Transfer to the slow cooker, add the keema, water, and peas. Cook on low for 6-8 hours or on high for 3-4 hours.
Nutritional Information (Approximate, per serving):
- Calories: 450-550
- Protein: 25-30g
- Carbohydrates: 40-50g
- Fat: 20-30g
Note: These values are approximate and may vary based on specific ingredients and portion sizes.
Serving Suggestions: The Grand Presentation
Serve the hot, puffed-up pooris immediately with the flavorful keema matar. A side of raita (yogurt dip) or a tangy pickle can elevate the experience even further. Don’t forget a sprinkle of fresh coriander for that final touch of freshness!
Your Mission, Should You Choose to Accept It:
Now, my dear readers, it’s your turn! Head to your kitchens, gather your ingredients, and embark on this delicious culinary adventure. I promise, the aroma alone will make your home feel like a celebration.
Try this recipe at home, and most importantly, share the love (and the food!) with your friends and family. After all, food is best enjoyed when shared with loved ones. Happy cooking!