Garma Garam Poori Aur Chatpati Pachadi: A Taste of Home!
Namaste Doston! Aadaab! Kem Chho? Chef Curry Do’pyaza here, back in your kitchens and ready to spice up your life! Today, we’re diving headfirst into a classic Indian comfort food combo: fluffy, golden Pooris with a tangy, vibrant Pachadi. This isn’t just a meal; it’s a memory, a celebration, a warm hug on a plate.
This delightful duo is especially popular in South India, gracing tables during festivals like Ugadi, Sankranthi, and even a simple Sunday brunch. It’s the kind of food that brings families together, sparking laughter and stories around the table. You’ll often find it prepared during the warmer months, as the Pachadi’s cooling properties offer respite from the scorching Indian sun.
A Little Trip Down Memory Lane
Poori, that delightful deep-fried bread, has been a staple in Indian cuisine for centuries. Its exact origins are a bit hazy, like trying to find that missing sock in your laundry, but it’s believed to have evolved from earlier forms of unleavened bread. Pachadi, on the other hand, is a South Indian relish, a symphony of flavors that varies from region to region. Think of it as the Indian cousin of salsa, but with a uniquely tangy and spicy twist.
Let’s Get Cooking!
Preparation Time: 20 minutes
Cooking Time: 30 minutes
Ingredients You’ll Need:
For the Pooris:
- 2 cups Gehun ka Atta (Whole Wheat Flour)
- 1 tbsp Sooji (Semolina) – for that extra crispiness!
- 1 tsp Ajwain (Carom Seeds) – for digestion and flavor
- 1/2 tsp Namak (Salt)
- 2 tbsp Tel (Oil) – for kneading
- Pani (Water) – as needed, to form a dough
- Tel (Oil) – for deep frying
For the Pachadi (Tomato Pachadi):
- 2 large Tamatar (Tomatoes), finely chopped
- 1 medium Pyaz (Onion), finely chopped
- 2-3 Hari Mirch (Green Chilies), finely chopped (adjust to your spice level!)
- 1 inch Adrak (Ginger), grated
- 1 tbsp Imli ka Guda (Tamarind Paste)
- 1/2 tsp Rai (Mustard Seeds)
- 1/4 tsp Urad Dal (Split Black Gram)
- 1/4 tsp Hing (Asafoetida)
- 1 sprig Curry Patta (Curry Leaves)
- 2 tbsp Tel (Oil)
- Namak (Salt) to taste
- Hara Dhaniya (Fresh Coriander Leaves) for garnish
Step-by-Step Instructions:
Poori Magic:
- Dough Time: In a large bowl, mix together the atta, sooji, ajwain, and salt. Add the oil and mix well.
- Knead Away: Gradually add water, a little at a time, and knead into a firm, smooth dough. It shouldn’t be sticky! Cover the dough with a damp cloth and let it rest for at least 15 minutes. This allows the gluten to relax, resulting in softer Pooris.
- Rolling Thunder: Divide the dough into small, equal-sized balls. Roll each ball into a small, even circle, about 3-4 inches in diameter. Don’t make them too thin, or they’ll become crispy instead of fluffy.
- Fry ‘Em Up: Heat oil in a deep frying pan or kadhai over medium-high heat. To test if the oil is hot enough, drop a tiny piece of dough into the oil. It should rise to the surface immediately.
- Poori Power: Gently slide a poori into the hot oil. Using a slotted spoon, press down lightly on the poori. It should puff up beautifully!
- Golden Brown Goodness: Fry the poori until it’s golden brown on both sides. Remove it from the oil and place it on a paper towel-lined plate to drain excess oil.
- Repeat: Repeat the process with the remaining pooris.
Pachadi Perfection:
- Tadka Time: Heat oil in a pan over medium heat. Add mustard seeds. Once they splutter, add urad dal, hing, and curry leaves. Sauté for a few seconds until the dal turns light brown.
- Aromatic Affair: Add the chopped onions and green chilies. Sauté until the onions turn translucent.
- Tomato Tango: Add the chopped tomatoes and grated ginger. Cook until the tomatoes soften and become pulpy.
- Tangy Twist: Add the tamarind paste and salt. Mix well and simmer for 5-7 minutes, or until the pachadi thickens slightly.
- Finishing Flourish: Garnish with fresh coriander leaves.
Chef Curry’s Top Tips:
- Hot Oil is Key: The oil must be hot enough for the pooris to puff up properly. If the oil isn’t hot enough, the pooris will absorb too much oil and become soggy.
- Don’t Overcrowd the Pan: Fry only one or two pooris at a time to maintain the oil temperature.
- Rest the Dough: Resting the dough is crucial for soft and fluffy pooris.
- Pachadi Variations: Feel free to experiment with different vegetables in your pachadi. Cucumber, bottle gourd, or even mangoes can add a unique twist.
Cooking it Your Way:
- Gas Stove/Induction Stove: The recipe is designed for stovetop cooking, both gas and induction.
- Pressure Cooker (for Pachadi): You can pressure cook the tomatoes and onions for the pachadi for 2 whistles for a faster cooking time. Release the pressure naturally before proceeding with the recipe.
- Air Fryer (for Pooris – experimental): While traditionally deep-fried, you can try air frying the pooris. Lightly brush the rolled pooris with oil and air fry at 375°F (190°C) for 5-7 minutes, flipping halfway through. The results may vary, and they might not puff up as much as deep-fried pooris.
- Slow Cooker/Crockpot (for Pachadi): While not ideal, you could cook the pachadi in a slow cooker on low for 4-6 hours. However, the flavors might not be as vibrant.
Nutritional Information (approximate, per serving):
- Calories: 350-400
- Fat: 20-25g
- Carbohydrates: 40-45g
- Protein: 5-7g
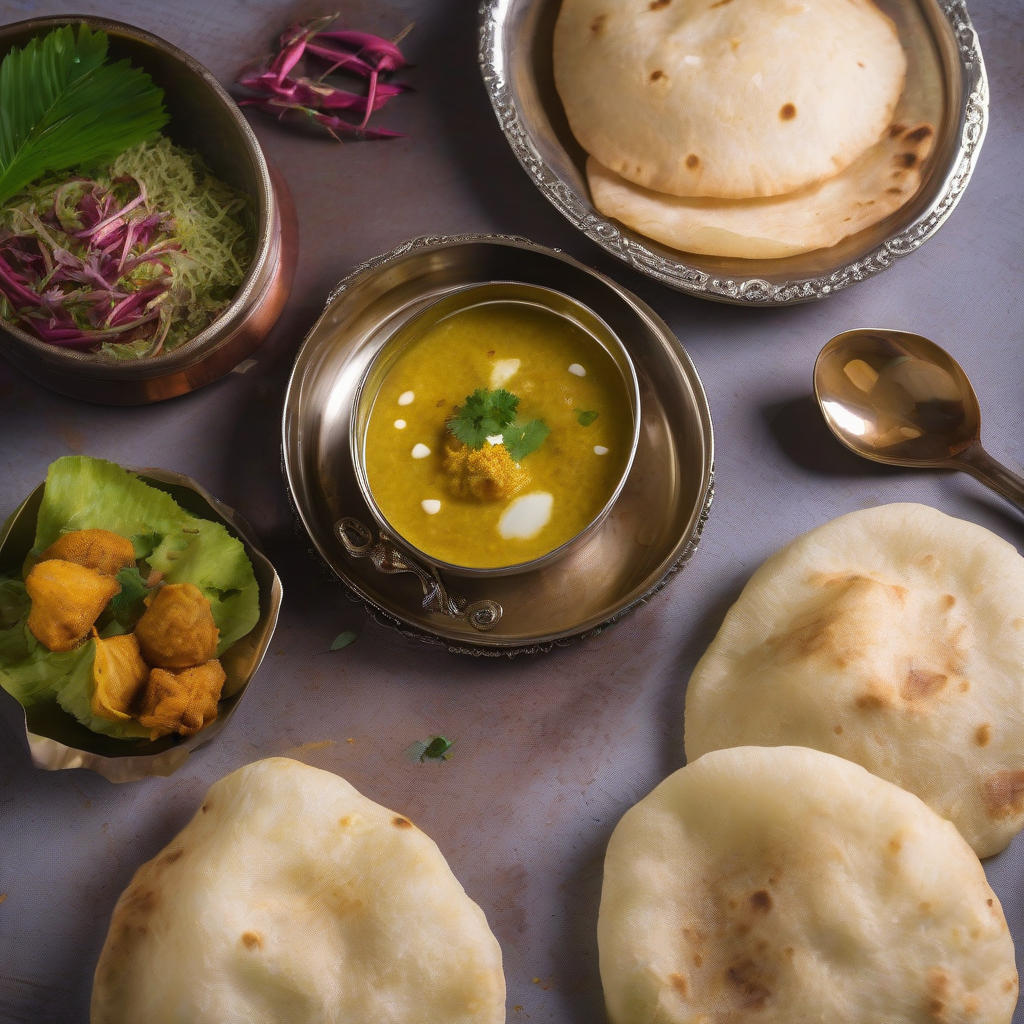
Serving Suggestions:
Serve the hot, puffed-up Pooris immediately with the tangy Pachadi. A dollop of plain yogurt or a sprinkle of sev (crispy chickpea noodles) can add extra layers of flavor and texture. This dish is a complete meal on its own, perfect for breakfast, lunch, or a light dinner.
A Final Word From Chef Curry:
There you have it, folks! A simple yet satisfying recipe that’s sure to bring a smile to your face. Don’t be intimidated by the steps; cooking should be fun and relaxing. So, put on your apron, gather your ingredients, and get ready to create some magic in your kitchen!
Now, go ahead and try this recipe at home. Share the love by cooking it for your friends and family. Let me know how it turns out in the comments below! Happy cooking, and until next time, keep those spices sizzling!