Tandoori Roti: Ghar Ka Khana, Dil Se Bana! (Home Food, Made with Love!)
Namaste Dosto! And a warm “Kem Chho?” to my Gujarati friends! Chef Curry Do’pyaza here, back in your kitchens with another delicious slice of India. Today, we’re tackling a staple, a classic, a bread that’s as comforting as a warm hug: Tandoori Roti!
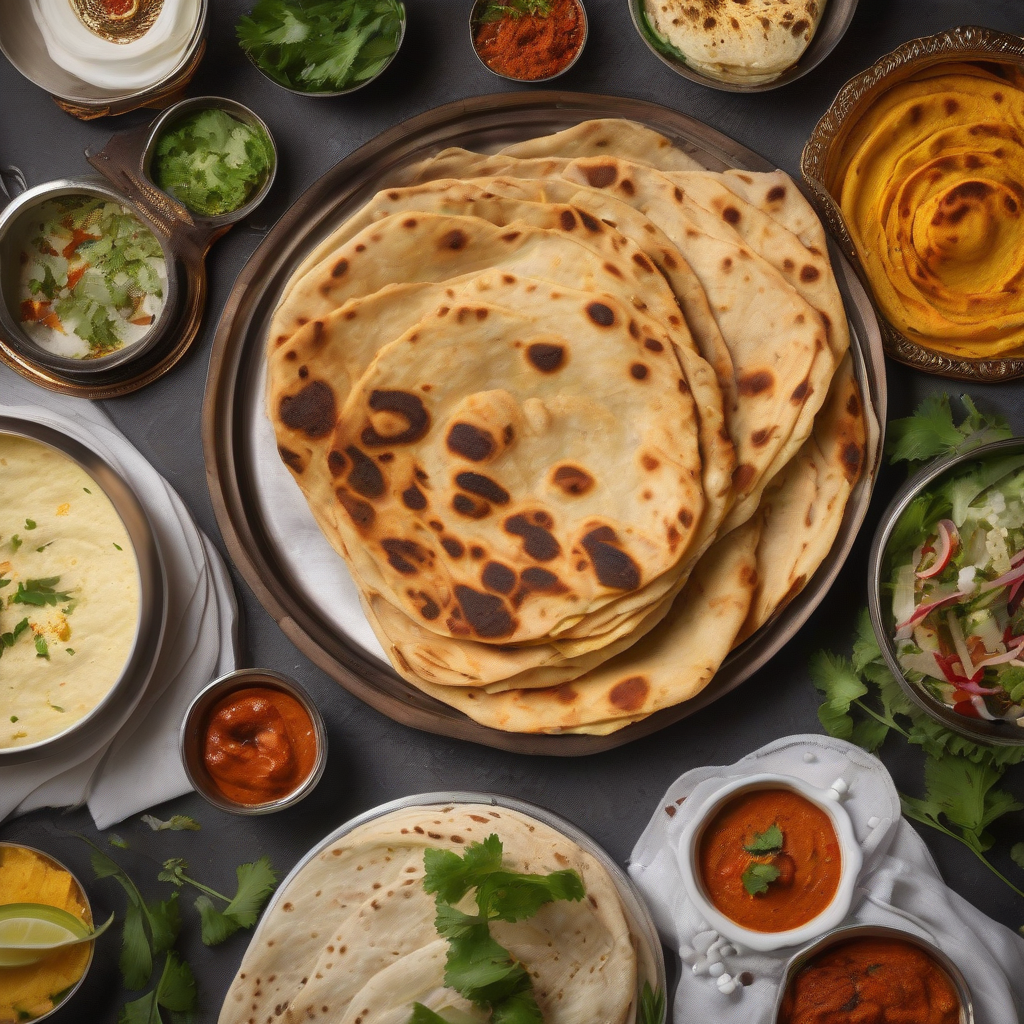
This isn’t just any roti, folks. This is Tandoori Roti. It evokes images of bustling dhabas (roadside restaurants) with the smoky aroma of charcoal, the rhythmic thud of dough being slapped, and the happy chatter of hungry patrons. It’s the perfect accompaniment to rich curries, flavorful dals, and grilled kebabs.
Tandoori Roti shines during festive occasions! Think Diwali feasts, Holi celebrations, and even those cozy family dinners during the monsoon season. It’s a bread that brings people together, bridging generations with its simple, yet satisfying flavor.
A Little History Lesson
The Tandoor oven, a clay oven that’s the heart of Tandoori cooking, originated in Central Asia and made its way to India centuries ago. Tandoori Roti, cooked in this fiery oven, became a popular flatbread, especially in North India and Pakistan. Traditionally, it was the domain of professional cooks due to the specialized oven. But don’t worry, my friends! I’m going to show you how to achieve a similar, delicious result right in your own kitchen.
Recipe De Do, Chef! (Give the Recipe, Chef!)
Preparation Time: 20 minutes (plus 30 minutes resting)
Cooking Time: 2-3 minutes per roti
Ingredients:
- 2 cups Gehun ka Atta (Whole Wheat Flour)
- 1/2 teaspoon Namak (Salt)
- 1 tablespoon Tel (Oil)
- Approximately 3/4 cup Pani (Water), lukewarm
- Dry Atta (Flour) for dusting
Let’s Get Cooking!
- Dough Time: In a large bowl, combine the atta (whole wheat flour) and namak (salt). Add the tel (oil) and mix well.
- Slowly Add Water: Gradually add the pani (water), kneading the mixture into a soft, pliable dough. The dough should be smooth and not too sticky.
- Rest is Best: Cover the dough with a damp cloth and let it rest for at least 30 minutes. This allows the gluten to relax, resulting in softer rotis.
- Divide and Conquer: After resting, knead the dough lightly again. Divide the dough into equal-sized balls, about the size of a small lemon.
- Roll it Out: On a lightly floured surface, roll out each ball into a circle, about 6-7 inches in diameter. Don’t worry if they’re not perfectly round; rustic is charming!
- Get Cooking: Heat a tava (griddle) or a heavy-bottomed pan over medium-high heat.
- Cook One Side: Place the roti on the hot tava and cook for about 30-45 seconds, or until small bubbles start to appear on the surface.
- Flip and Cook: Flip the roti and cook for another 30-45 seconds, until the underside starts to get light brown spots.
- The Direct Flame Trick (Optional, but Recommended): Now, using tongs, carefully place the roti directly over a gas flame (or an induction cooktop flame, if you have one). Puff it up! Keep rotating the roti until it puffs up completely and gets brown spots all over. Be careful not to burn it!
- Brush with Ghee (Optional): Brush the hot roti with a little ghee (clarified butter) for added flavor and softness.
- Serve Hot: Serve immediately with your favorite curry, dal, or kebab.
Chef Curry’s Top Tips for Tandoori Roti Perfection:
- Water Temperature: Use lukewarm water for the dough. It helps activate the gluten and makes the dough more elastic.
- Resting is Key: Don’t skip the resting time! It makes a huge difference in the texture of the roti.
- Hot Tava: Make sure the tava is hot before you start cooking the rotis. This will ensure they cook evenly and puff up nicely.
- Practice Makes Perfect: Don’t be discouraged if your first few rotis aren’t perfect. Keep practicing, and you’ll get the hang of it!
Different Ways to Make Tandoori Roti (Because We’re All About Options!)
- Gas Stove: As described above, this is the most common and effective method for achieving a tandoori-like effect.
- Induction Stove: Similar to the gas stove method, use the direct flame (if your induction cooktop has a flame setting) for the final puffing.
- Oven: Preheat your oven to the highest temperature (broil setting). Place the roti on a baking sheet and broil for a minute or two per side, until puffed and lightly browned. Watch carefully to avoid burning!
- Pressure Cooker: Heat the pressure cooker pan (without the lid or whistle). Cook the roti on the hot pan as you would on a tava, then briefly hold it over the direct flame for puffing.
- Microwave: While not ideal for achieving the traditional texture, you can warm up already cooked rotis in the microwave for a few seconds.
- Air Fryer: You can try air frying the roti. Preheat the air fryer to 350°F (175°C). Place the roti in the air fryer basket and cook for 2-3 minutes per side, or until lightly browned.
- Slow Cooker/Crockpot: These are not suitable for making Tandoori Roti.
Nutritional Information (Approximate, per Roti):
- Calories: 80-100
- Protein: 2-3 grams
- Carbohydrates: 15-20 grams
- Fat: 1-2 grams
- Fiber: 2-3 grams
Serving Suggestions:
- Classic Combo: Serve with Dal Makhani, Butter Chicken, or Paneer Tikka Masala.
- Wrap it Up: Use it as a wrap for kebabs, vegetables, or leftover curry.
- Simple and Satisfying: Enjoy with a dollop of ghee and a sprinkle of salt.
Ab Aapki Baari Hai! (Now It’s Your Turn!)
So there you have it, my friends! A simple, yet incredibly satisfying recipe for Tandoori Roti. I urge you to try this recipe at home. It’s easier than you think, and the taste of freshly made roti is simply unbeatable. Share the joy with your friends and family, and let the aroma of home-cooked goodness fill your kitchen! Happy cooking!