Bhindi Bliss: Let’s Make This Crispy, Crunchy Delight!
Namaste Dosto! Kem cho? Sat Sri Akal! Vanakkam! (Greetings friends! How are you? Greetings with truth! Greetings!)
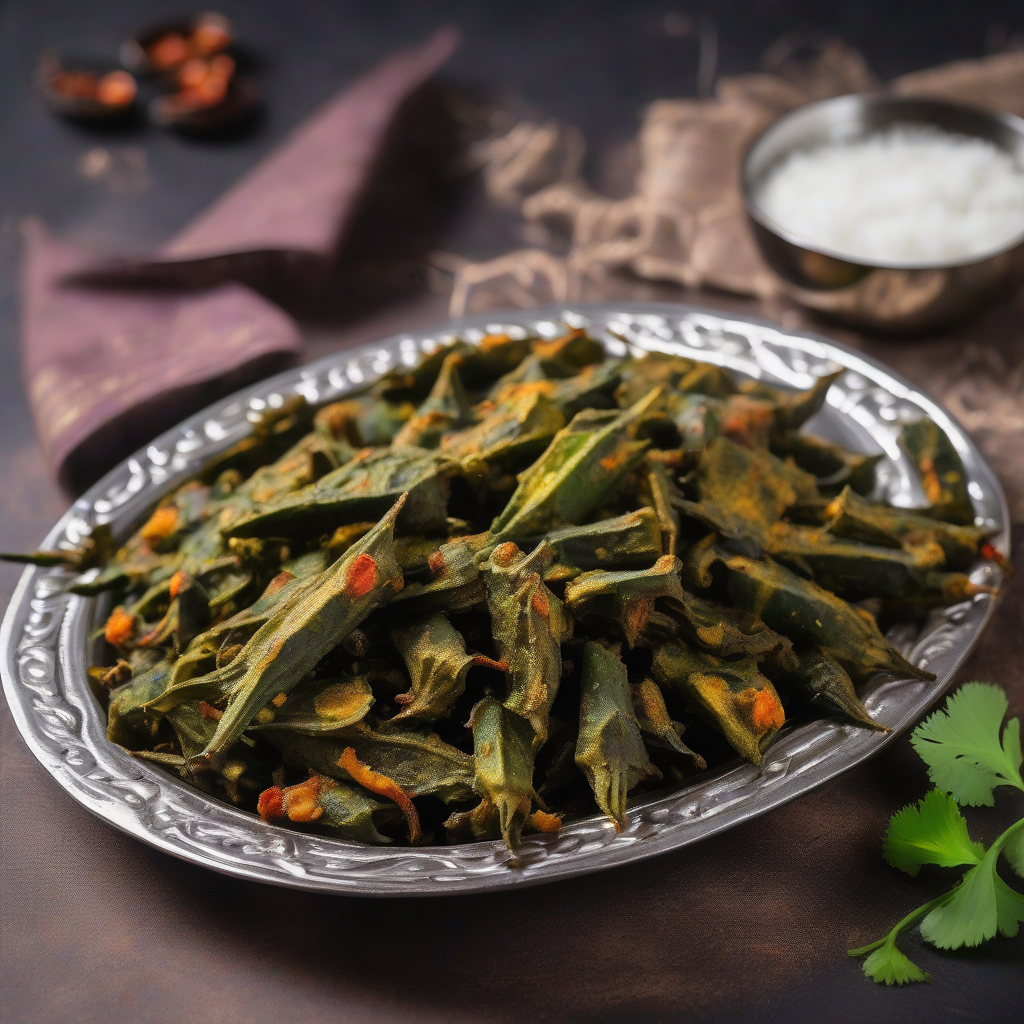
Chef Curry Do’pyaza here, back in your kitchens with a recipe that’s close to my heart: Bhindi Fry! This isn’t just a dish; it’s a celebration of simple flavors, a testament to the magic you can create with just a handful of ingredients.
Bhindi Fry is a beloved dish in many Indian homes, especially in North India and Gujarat. It’s a staple during Navratri fasts (because it’s naturally gluten-free!), a comforting side dish during Diwali feasts, and a welcome addition to any summer thali. You’ll find it gracing lunch boxes, dinner tables, and even picnics! The beauty of Bhindi Fry is its versatility and the sheer joy it brings.
A Little Bhindi History…
Okra, or bhindi as we lovingly call it, isn’t actually Indian in origin! It’s believed to have originated in Ethiopia and made its way to India centuries ago. Over time, we’ve embraced it and given it our own unique, flavorful spin, transforming it into the delicious dish we know and love today.
Ready to Cook?
Preparation Time: 15 minutes
Cooking Time: 20 minutes
What You’ll Need (The Star Cast):
- 250 grams Bhindi (Okra), washed and dried thoroughly
- 2 tablespoons Tel (Vegetable Oil)
- 1 teaspoon Jeera (Cumin Seeds)
- 1/4 teaspoon Hing (Asafoetida)
- 1 medium Pyaz (Onion), finely chopped
- 1-2 Hari Mirch (Green Chilies), finely chopped (adjust to your spice level!)
- 1 teaspoon Adrak-Lahsun Paste (Ginger-Garlic Paste)
- 1/2 teaspoon Haldi Powder (Turmeric Powder)
- 1 teaspoon Dhaniya Powder (Coriander Powder)
- 1/2 teaspoon Lal Mirch Powder (Red Chili Powder)
- 1/2 teaspoon Amchur Powder (Dry Mango Powder)
- Salt to taste
- Fresh Hara Dhaniya (Cilantro) for garnish
Let’s Get Cooking! (The Action Begins)
- Prep the Bhindi: This is the most important step! Wash the bhindi well and dry it completely. Moisture is the enemy of crispy bhindi. Trim the ends and slice them into 1/2 inch pieces.
- Tadka Time! Heat the oil in a kadhai (wok) or a wide pan over medium heat. Add the jeera and hing. Let them sizzle for a few seconds until fragrant.
- Onion Magic: Add the chopped pyaz and green chilies. Sauté until the onions turn a beautiful golden brown. This adds a lovely sweetness to the dish.
- Ginger-Garlic Goodness: Add the adrak-lahsun paste and sauté for another minute until the raw smell disappears.
- Spice It Up! Add the haldi powder, dhaniya powder, and lal mirch powder. Sauté for a few seconds, being careful not to burn the spices.
- Bhindi Bonanza! Add the sliced bhindi to the pan. Mix well to coat the bhindi with the spices.
- Cook to Perfection: Cook the bhindi over medium heat, stirring occasionally, until it’s tender and slightly crispy. This will take about 15-20 minutes. Don’t cover the pan, as this will trap moisture and make the bhindi soggy.
- Amchur Ace: Once the bhindi is cooked, add the amchur powder and salt to taste. Mix well and cook for another minute. The amchur adds a tangy, delicious flavor.
- Garnish and Serve: Garnish with fresh hara dhaniya. Serve hot with roti, dal, and rice.
Chef Curry’s Top Tips:
- Dry, Dry, Dry! I can’t stress this enough. Make sure the bhindi is completely dry before cooking.
- Don’t Overcrowd: Cook the bhindi in a single layer in the pan. Overcrowding will steam the bhindi instead of frying it.
- Patience is Key: Don’t rush the cooking process. Allow the bhindi to cook properly until it’s tender and crispy.
- Lemon Love: A squeeze of lemon juice at the end can brighten up the flavors even more!
Bhindi Fry: Your Way!
- Gas Stove/Induction Stove: The classic method! Follow the recipe as is for delicious results.
- Air Fryer: Toss the bhindi with a little oil and spices, then air fry at 375°F (190°C) for 10-12 minutes, shaking halfway through.
- Oven: Spread the bhindi on a baking sheet, toss with oil and spices, and bake at 400°F (200°C) for 15-20 minutes, flipping halfway through.
- Pressure Cooker: While not ideal for crispy bhindi, you can pressure cook it for 1 whistle with very little water for a softer version.
- Microwave: I don’t recommend this method for bhindi fry, as it will likely become soggy.
Nutritional Nuggets:
Bhindi is a good source of fiber, vitamins, and minerals. It’s low in calories and a healthy addition to your diet. It’s packed with Vitamin C, Vitamin K, and folate!
Serving Suggestions:
- Serve with roti, paratha, or naan for a complete meal.
- Pair it with dal (lentils) and rice for a comforting lunch or dinner.
- Pack it in your lunch box for a tasty and healthy snack.
- Enjoy it as a side dish with your favorite Indian curry.
Now It’s Your Turn!
Go ahead, give this Bhindi Fry recipe a try! It’s easier than you think, and the results are simply delightful. Share the deliciousness with your friends and family. Let them experience the magic of homemade Indian food!