Khandvi Khaana: Let’s Roll into Deliciousness!
Namaste, mere pyaare doston! Kem cho? (Hello, my dear friends! How are you?) Chef Curry Do’pyaza here, ready to whisk you away on another culinary adventure! Today, we’re diving deep into the world of Khandvi, a delicate, melt-in-your-mouth snack that’s as delightful to look at as it is to eat.
Khandvi is a popular dish in Gujarati, Maharashtrian and Rajasthani homes. You’ll often find it gracing tables during festive occasions like Diwali, Janmashtami, weddings, and even just a simple family get-together. It’s a light, flavorful treat, perfect for a mid-afternoon snack or a light appetizer. This tasty snack is especially popular during the cooler months of the year.
A Little Khandvi History
The exact origins of Khandvi are a bit hazy, but it’s believed to have originated in Gujarat. For generations, Gujarati families have perfected this recipe, passing it down through generations. It’s a testament to the simple elegance of Indian cuisine – taking humble ingredients and transforming them into something truly special.
Get Ready to Cook!
- Preparation Time: 15 minutes
- Cooking Time: 20 minutes
What You’ll Need (Ingredients)
- Besan (Gram Flour): 1 cup
- Dahi (Yogurt): 1 cup, slightly sour is best
- Pani (Water): 1 cup
- Adrak-Mirchi ki Paste (Ginger-Green Chili Paste): 1 teaspoon
- Haldi Powder (Turmeric Powder): 1/4 teaspoon
- Namak (Salt): To taste
- Sugar (Cheeni): 1 teaspoon (optional, but recommended)
For Tempering (Tadka):
- Tel (Oil): 2 tablespoons
- Rai (Mustard Seeds): 1 teaspoon
- Hing (Asafoetida): A pinch
- Til (Sesame Seeds): 1 tablespoon
- Hara Dhaniya (Fresh Coriander Leaves): 2 tablespoons, finely chopped
- Kopra (Grated Coconut): 2 tablespoons, for garnish (optional)
- Curry Patta (Curry Leaves): 8-10, chopped
Let’s Make Some Magic! (Instructions)
- Mix it Up: In a large bowl, whisk together the besan, dahi, pani, adrak-mirchi paste, haldi powder, namak, and sugar until you have a smooth, lump-free batter. A smooth batter is the key to perfect Khandvi!
- Cook it Low and Slow: Pour the batter into a heavy-bottomed pan or kadhai. Cook over medium-low heat, stirring continuously to prevent lumps from forming. This is where your patience comes in handy!
- Stir, Stir, Stir: Keep stirring constantly until the mixture thickens and starts to leave the sides of the pan. It should resemble a smooth, glossy paste. This usually takes about 10-15 minutes.
- The Test: To check if it’s ready, spread a small spoonful of the mixture on a clean, flat surface (like the back of a plate or a greased tray). Let it cool for a minute. If you can easily roll it into a tight roll without it sticking, it’s ready!
- Spread the Love: While the mixture is still hot, quickly spread it thinly and evenly on a greased, flat surface like a baking sheet or a clean kitchen counter. Work quickly, as it will start to set fast.
- Cool and Cut: Let the spread mixture cool completely. Once cooled, cut it into strips about 1-inch wide.
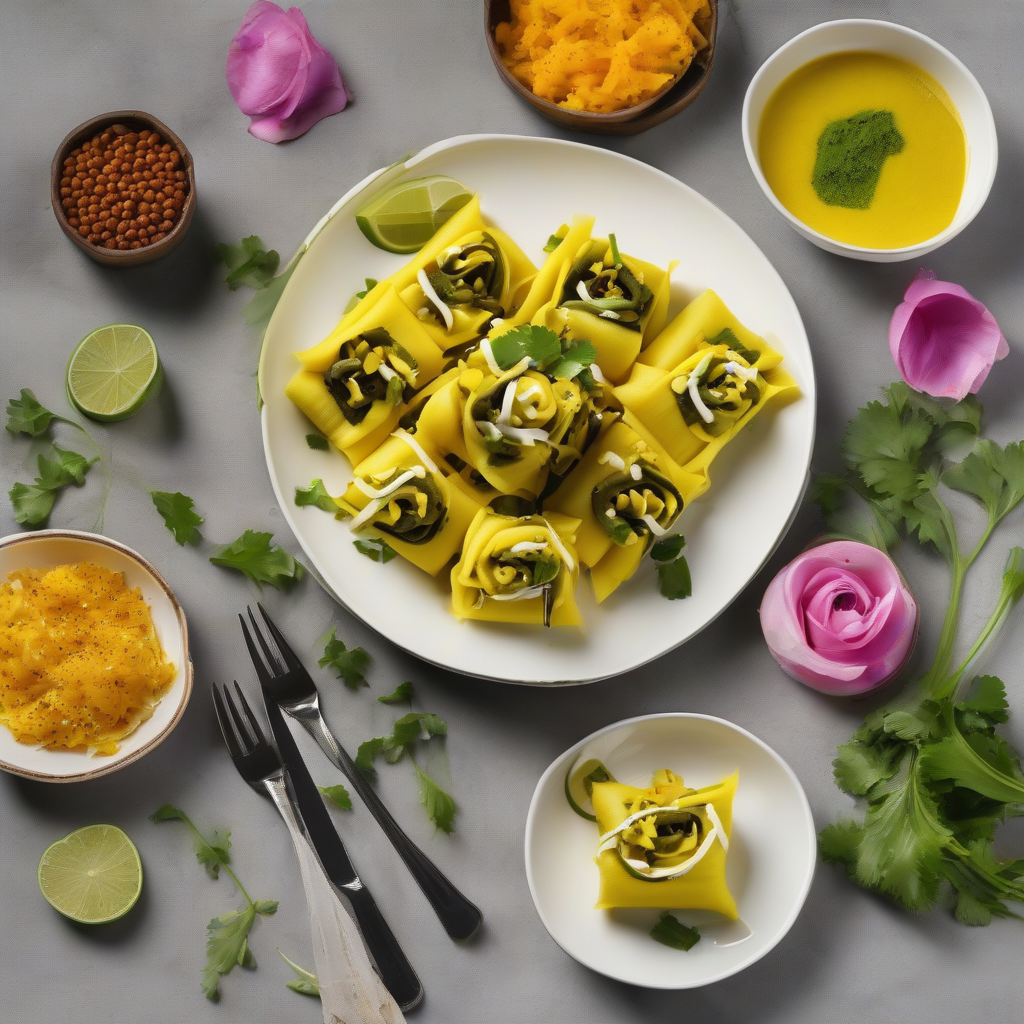
- Roll it Up: Gently roll each strip tightly, starting from one end. These delicate rolls are what make Khandvi so appealing.
- Tadka Time: Heat oil in a small pan. Add mustard seeds and let them splutter. Add hing and curry leaves and fry for a few seconds. Turn off the heat and add sesame seeds.
- Dress it Up: Pour the tadka evenly over the rolled Khandvi. Garnish with fresh coriander leaves and grated coconut.
Chef Curry’s Tips for Khandvi Perfection
- Lump-Free Batter is Key: Use a whisk or a blender to ensure a smooth batter.
- Patience is a Virtue: Cooking the batter low and slow is essential to prevent burning and ensure even cooking.
- Work Quickly: Once the mixture is cooked, spread it immediately before it starts to set.
- Don’t Overcook: Overcooked Khandvi will be dry and brittle.
- Grease Generously: Make sure to grease your spreading surface well to prevent sticking.
Khandvi: Your Way!
While the traditional method is on the stovetop, here are a few variations:
- Microwave: Cook the batter in a microwave-safe bowl in 2-3 minute intervals, stirring in between, until thickened.
- Instant Pot: You can cook the batter in the Instant Pot using the sauté function, stirring constantly.
- Slow Cooker/Crockpot: Not recommended for this recipe.
Nutritional Goodness
Khandvi is a good source of protein and fiber, thanks to the besan. It’s also relatively low in calories, making it a guilt-free treat. However, be mindful of the oil used in the tempering.
Serving Suggestions
- Serve Khandvi as a snack with a cup of hot chai (tea).
- It makes a great appetizer for parties and gatherings.
- Pair it with green chutney or tamarind chutney for an extra burst of flavor.
Now It’s Your Turn!
Friends, I hope you enjoyed learning about this delicious and delicate dish. Now, it’s your turn to try making Khandvi at home. Gather your ingredients, follow the steps, and share this culinary delight with your friends and family. They’ll surely be impressed!
Happy cooking, and until next time, keep the flavors of India alive in your kitchen!