Jilipi Jalebi Junction: Sweetness that Sings!
Namaste Doston! Kem cho? Assalamualaikum! Sat Sri Akal! Chef Curry Do’pyaza here, ready to tickle your taste buds with a sweet treat that’s as vibrant as a Holi celebration and as comforting as a warm hug on a chilly winter evening. Today, we’re diving deep into the sugary swirls of Jilipi, or as some of you might know it, Jalebi!
This golden, crispy, syrupy delight is a star at countless Indian festivals. Think Diwali, Eid, Dussehra, and even weddings! It’s the perfect way to celebrate good news, a successful exam, or just a regular Tuesday when you feel like treating yourself! It’s a dish that transcends religious and regional boundaries, uniting us all in our love for something wonderfully sweet.
A Sweet History Lesson
Did you know that Jilipi isn’t originally from India? Legend has it that this sweet treat came to us from Persia (modern-day Iran) with the name “Zulbiya.” Over centuries, it travelled, evolved, and became the beloved Jilipi we know and adore today. Pretty cool, right?
Let’s Get Cooking!
Ready to make some magic? Here’s what you’ll need:
Preparation Time: 20 minutes (plus 8-10 hours for fermentation)
Cooking Time: 20-25 minutes
Ingredients:
- For the Batter:
- 1 cup Maida (All-Purpose Flour)
- 2 tablespoons Besan (Gram Flour)
- 1/4 teaspoon Baking Soda
- 1/4 teaspoon Haldi (Turmeric Powder) – for that gorgeous golden color!
- 1/2 cup Yogurt (Plain Yogurt)
- Water, as needed
- For the Sugar Syrup (Chashni):
- 1 cup Cheeni (Sugar)
- 1/2 cup Pani (Water)
- 1/4 teaspoon Elaichi Powder (Cardamom Powder)
- A few strands of Kesar (Saffron) – optional, but adds a beautiful aroma and color!
- 1/2 teaspoon Lemon Juice
- For Frying:
- Ghee or Vegetable Oil, for deep frying
Instructions:
- Make the Batter: In a large bowl, whisk together the maida, besan, baking soda, and haldi. Add the yogurt and mix well. Gradually add water, little by little, until you get a smooth, lump-free batter with a pouring consistency. It should be like a thick pancake batter.
- Ferment the Batter: Cover the bowl with a lid or plastic wrap and let it ferment at room temperature for at least 8-10 hours, or overnight. This is crucial for that slightly tangy taste and crispy texture.
- Prepare the Sugar Syrup: In a saucepan, combine the sugar and water. Bring to a boil over medium heat, stirring until the sugar dissolves completely. Add the cardamom powder, saffron strands (if using), and lemon juice. Simmer for 5-7 minutes, or until the syrup reaches a slightly sticky consistency. It should be slightly thicker than honey. Keep the syrup warm.
- Heat the Oil: Heat ghee or vegetable oil in a wide, shallow pan or kadhai over medium heat. The oil should be hot enough for deep frying, but not smoking.
- Make the Jilipis: Pour the fermented batter into a piping bag or a clean squeeze bottle (like an old ketchup bottle). You can also use a clean cloth with a small hole in the corner.
- Fry the Jilipis: Carefully pipe the batter into the hot oil in circular or pretzel-like shapes. Don’t overcrowd the pan. Fry for 2-3 minutes on each side, or until golden brown and crispy.
- Soak in Syrup: Immediately remove the fried jilipis from the oil and gently drop them into the warm sugar syrup. Let them soak for 1-2 minutes, turning them over once or twice to ensure they are well coated.
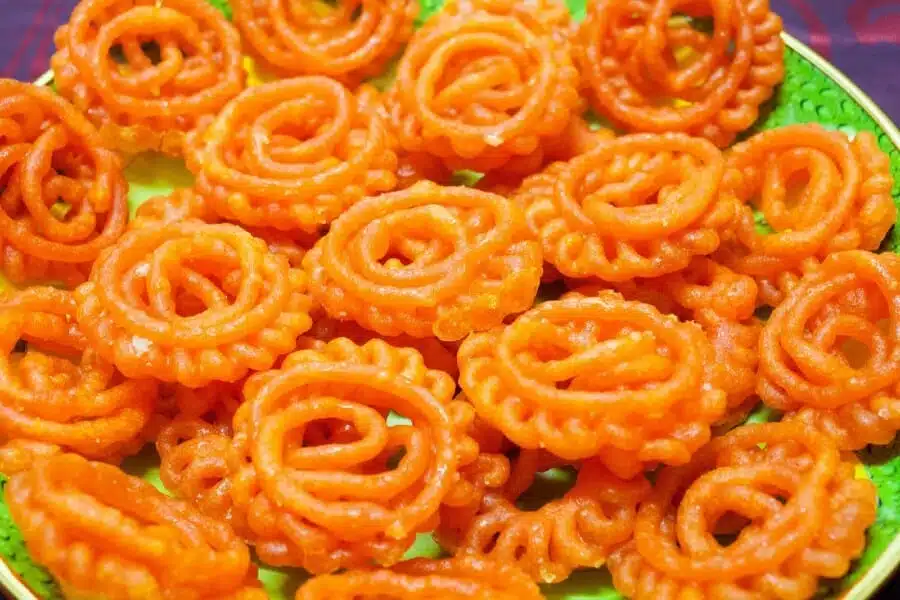
- Serve and Enjoy: Remove the jilipis from the syrup and place them on a serving plate. Serve them hot or warm, and watch them disappear!
Chef Curry’s Tips for Jilipi Perfection:
- Fermentation is Key: Don’t skip the fermentation step! It’s what gives Jilipi its unique flavor and texture.
- Batter Consistency: The batter should be smooth and flowing, but not too thin.
- Oil Temperature: The oil should be hot enough to fry the jilipis quickly, but not so hot that they burn.
- Warm Syrup: Make sure the sugar syrup is warm when you soak the fried jilipis. This helps them absorb the syrup properly.
- Don’t Overcrowd: Fry the jilipis in small batches to prevent the oil temperature from dropping.
Jilipi Your Way: Cooking Method Options
- Gas Stove: The traditional method, perfect for controlling the heat and achieving that golden-brown crisp.
- Induction Stove: Works just as well as a gas stove, offering precise temperature control.
- Air Fryer: While not traditional, you can air fry jalebi for a slightly healthier (but less crispy) version. Lightly brush with oil before air frying at 350°F (175°C) for about 8-10 minutes, flipping halfway. You’ll still need the sugar syrup!
- Oven: Baking jalebi is not recommended.
- Microwave: Microwaving jalebi is not recommended.
Nutritional Information (approximate, per serving):
- Calories: 250-300
- Carbohydrates: 50-60g
- Sugar: 30-40g
- Fat: 5-10g
Serving Suggestions:
- Enjoy them hot or warm, on their own.
- Serve with a scoop of vanilla ice cream or rabri (thickened milk) for an extra decadent treat.
- Pair with a glass of warm milk or a cup of chai (tea).
- Garnish with chopped pistachios or almonds for added flavor and texture.
So there you have it, folks! My foolproof recipe for making delicious, crispy, syrupy Jilipi at home. It might seem a little intimidating at first, but trust me, with a little practice, you’ll be making jilipis like a pro in no time.
Go ahead, try this recipe at home. Share the joy of this sweet treat with your friends and family. After all, food is best enjoyed when shared! Happy cooking!