Shankarpali Shenanigans with Chef Curry Do’pyaza!
Namaste Doston! Kem cho? Kai chal raha hai?
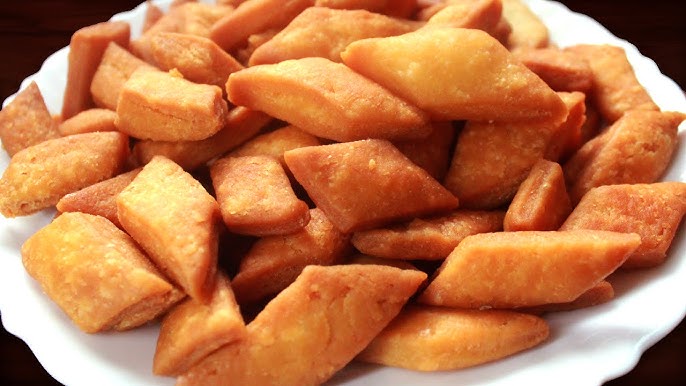
Your friendly neighbourhood Chef Curry Do’pyaza here, back with another delightful dish straight from my kitchen to your hearts! Today, we’re diving into the sweet and crispy world of Shankarpali – a beloved treat that brings back fond memories of festive cheer and grandma’s loving hands.
Shankarpali is more than just a snack; it’s a feeling. It is a crispy, golden reminder of joyous times spent with family and friends.
When Do We Devour These Delicious Diamonds?
Think Diwali, the festival of lights, and Sankranti, the kite-flying extravaganza! These are the prime times when Shankarpali graces our tables. But honestly, who needs an excuse? Any time is Shankarpali time in my book! It’s a perfect treat to enjoy with your evening chai or to pack for a long journey.
A Little Dip into History…
The exact origin of Shankarpali is a bit hazy, like the steam rising from a hot cup of masala chai. However, it’s believed to have originated in Maharashtra and quickly spread its sweet, crispy charm across India. For generations, it has been a staple in Indian households, passed down through families. It is a testament to the simple joys of home-cooked goodness.
Let’s Get Cooking!
Here’s how to make these crunchy treats at home. Trust me, it’s easier than you think!
Preparation Time: 20 minutes
Cooking Time: 30 minutes
Ingredients – The Magic Makers:
- 2 cups Maida (All-Purpose Flour)
- ½ cup Sooji (Semolina) – for that extra crunch!
- ½ cup Pithi Shakkar (Powdered Sugar) – adjust to your sweetness preference
- ¼ cup Ghee (Clarified Butter) – the secret to that rich, melt-in-your-mouth texture
- ½ cup Milk – warm, for binding everything together
- Pinch of Elaichi Powder (Cardamom Powder) – for that aromatic touch
- Oil – for deep frying, enough to submerge the Shankarpali
Step-by-Step Shankarpali Symphony:
- Mix the Dry Ingredients: In a large bowl, whisk together the maida, sooji, pithi shakkar, and elaichi powder. Make sure everything is well combined.
- Add the Ghee: Warm the ghee slightly and pour it into the dry ingredients. Use your fingertips to rub the ghee into the flour mixture until it resembles breadcrumbs. This step is crucial for achieving that flaky texture.
- Bind with Milk: Gradually add the warm milk, mixing until a firm dough forms. Don’t over-knead! Just bring it together.
- Rest the Dough: Cover the dough with a damp cloth and let it rest for at least 15 minutes. This allows the gluten to relax, resulting in softer Shankarpali.
- Roll and Cut: Divide the dough into two equal portions. On a lightly floured surface, roll out one portion into a medium-thick circle (about ¼ inch thick). Use a sharp knife or a pizza cutter to cut the circle into diamond shapes (Shankarpali!).
- Fry to Golden Perfection: Heat oil in a deep frying pan over medium heat. Gently slide the Shankarpali into the hot oil, a few at a time. Do not overcrowd the pan. Fry until they turn golden brown and crispy, flipping occasionally.
- Drain and Cool: Remove the fried Shankarpali with a slotted spoon and place them on a paper towel-lined plate to drain excess oil. Let them cool completely before storing.
Chef’s Tips for the Best Shankarpali:
- Don’t Over-Knead: Over-kneading will result in hard Shankarpali.
- Medium Heat is Key: Frying on medium heat ensures that the Shankarpali cook evenly and turn golden brown.
- Cool Completely: Store the Shankarpali in an airtight container only after they have cooled completely. This will prevent them from becoming soggy.
- Ghee is Gold: Using good quality ghee makes a world of difference in the taste and texture.
Shankarpali: Different Strokes for Different Folks!
- Gas Stove: The traditional method, perfect for achieving that authentic flavour.
- Induction Stove: Works just as well as a gas stove, providing precise temperature control.
- Air Fryer: For a healthier twist, you can air fry the Shankarpali at 350°F (175°C) for 10-12 minutes, flipping halfway through. They won’t be as golden, but they’ll still be delicious!
- Oven: Bake at 350°F (175°C) for 15-20 minutes, flipping halfway. Keep a close eye on them to prevent burning.
Nutritional Nuggets (per serving, approximate):
- Calories: 200-250
- Fat: 10-15g
- Carbohydrates: 25-30g
- Protein: 3-4g
Serving Suggestions:
- Enjoy them with a hot cup of chai or coffee.
- Serve them as a sweet treat after a meal.
- Pack them in a lunchbox for a delightful snack.
- Share them with friends and family during festive occasions.
Time to Get Cooking!
So, there you have it – my foolproof recipe for making delicious Shankarpali at home. Gather your ingredients, put on some Bollywood music, and get ready to create some sweet memories in your kitchen!
Go ahead, try this recipe and share the joy with your loved ones. Let me know how it turns out in the comments below!
Khush Raho, Mast Raho! (Be happy, be awesome!)
Your friend,
Chef Curry Do’pyaza