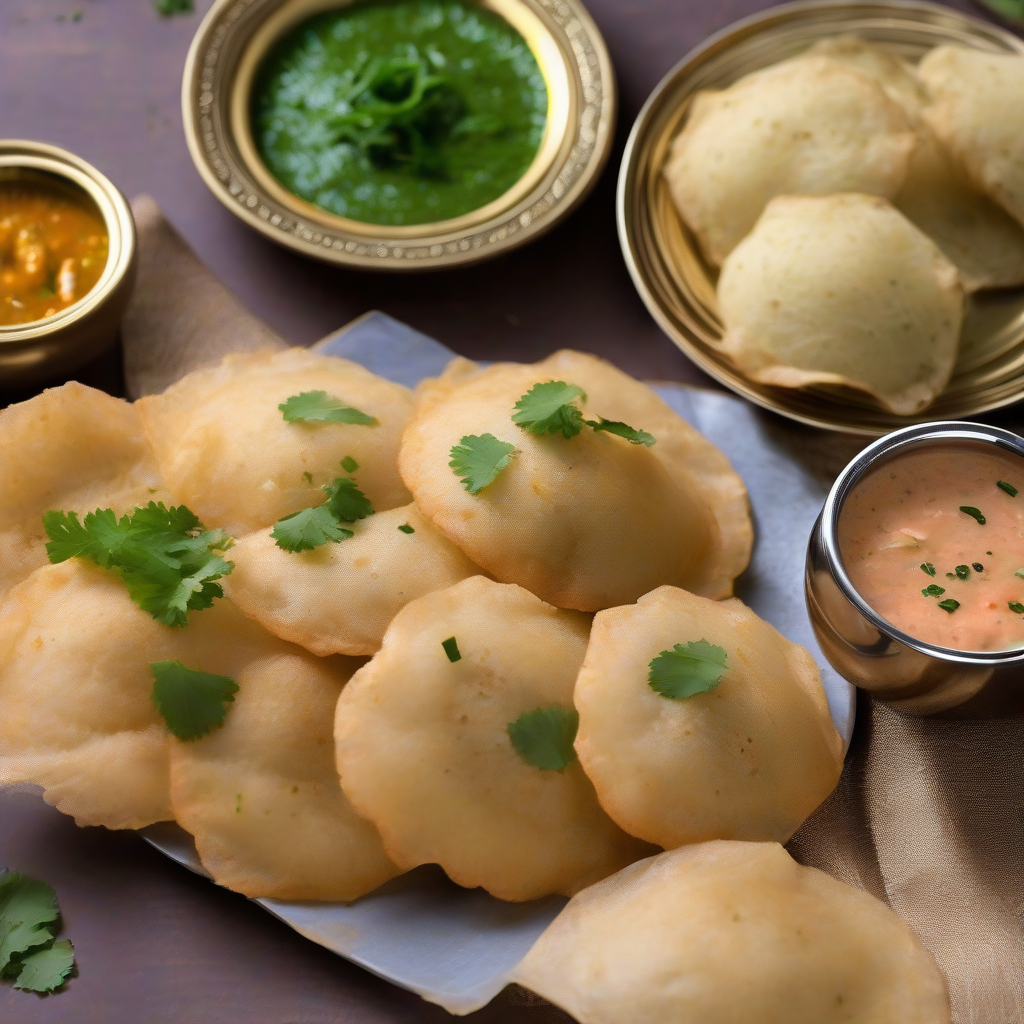
Rava Poori: Suji Ka Magic – Crispy, Puffy Delight!
Namaste, my foodie friends! Kem cho? Kai po che? (How are you all doing?) Chef Curry Do’pyaza here, back with another recipe that’s sure to tantalize your taste buds and bring a smile to your face. Today, we’re diving into the world of Rava Poori, also lovingly known as Suji Poori – a crispy, puffy, golden delight that’s perfect for any occasion!
Rava Poori is a beloved snack in many Indian homes, especially in Western and Southern India. It’s a staple during festive times like Diwali, Holi, and even those surprise visits from relatives (you know the ones!). It’s also a popular breakfast or evening snack, especially when you crave something quick, easy, and satisfyingly crunchy.
A Little History Lesson
While the exact origins are a bit hazy, Rava Poori is believed to have evolved as a quicker and simpler alternative to traditional wheat flour poori. The addition of rava (semolina) gives it a unique texture and a delightful crispness that’s hard to resist. It’s a testament to Indian ingenuity – taking simple ingredients and transforming them into something truly special!
The Recipe: Rava Poori – Crispy Goodness Awaits!
Preparation Time: 15 minutes
Cooking Time: 20 minutes
Ingredients:
- Rava (Semolina/Suji): 1 cup
- Atta (Whole Wheat Flour): ½ cup
- Besan (Gram Flour): 2 tablespoons
- Ajwain (Carom Seeds): ½ teaspoon
- Jeera (Cumin Seeds): ½ teaspoon
- Adrak-Lahsun Paste (Ginger-Garlic Paste): 1 teaspoon
- Hara Dhania (Fresh Coriander Leaves): 2 tablespoons, finely chopped
- Dahi (Yogurt): 2 tablespoons
- Tel (Cooking Oil): For deep frying, plus 1 tablespoon for the dough
- Namak (Salt): To taste
- Lal Mirch Powder (Red Chilli Powder): ½ teaspoon (optional, for a little kick!)
- Garam Masala: ¼ teaspoon (optional)
- Water: As needed to form the dough
Instructions:
- Mix the Dry Ingredients: In a large bowl, combine the rava, atta, besan, ajwain, jeera, salt, lal mirch powder (if using), and garam masala (if using). Mix everything together until well combined.
- Add the Wet Ingredients: Add the ginger-garlic paste, chopped coriander leaves, and yogurt to the dry ingredients. Mix well.
- Form the Dough: Add 1 tablespoon of oil and start adding water gradually, a little at a time, while mixing. Knead the mixture into a firm, non-sticky dough. The dough should be tighter than a regular roti dough.
- Rest the Dough: Cover the dough with a damp cloth and let it rest for at least 15 minutes. This allows the rava to absorb the moisture and the dough to become more pliable.
- Roll Out the Pooris: Divide the dough into small, equal-sized balls. On a lightly oiled surface, roll each ball into a small, thin circle (about 3-4 inches in diameter). Don’t make them too thick, or they won’t puff up properly.
- Fry the Pooris: Heat oil in a deep frying pan or kadhai over medium-high heat. Make sure the oil is hot enough – test it by dropping a tiny piece of dough into the oil. If it rises to the surface quickly, the oil is ready.
- Puff Them Up: Gently slide each poori into the hot oil. Using a slotted spoon, gently press down on the poori as it fries. This will help it puff up beautifully.
- Fry Until Golden: Fry each poori until it’s golden brown and crispy on both sides.
- Drain and Serve: Remove the pooris from the oil and drain them on a paper towel-lined plate to remove excess oil. Serve hot and enjoy!
Chef Curry’s Tips for the Perfect Rava Poori:
- The Dough is Key: The dough should be firm but not dry. If it’s too dry, the pooris will crack while frying. If it’s too sticky, they’ll absorb too much oil.
- Hot Oil is Essential: Make sure the oil is hot enough before frying. If the oil is not hot enough, the pooris will become soggy and oily.
- Don’t Overcrowd the Pan: Fry the pooris in batches to avoid overcrowding the pan and lowering the oil temperature.
- Press Gently: Gently pressing down on the poori while frying encourages it to puff up beautifully.
- Resting Time: Don’t skip the resting time for the dough. It makes a big difference in the texture of the pooris.
Cooking Variations:
- Gas Stove/Induction Stove: The standard method described above works perfectly on both gas and induction stoves.
- Air Fryer: While not traditional, you can try air frying the pooris for a healthier option. Brush them lightly with oil and air fry at 375°F (190°C) for 8-10 minutes, flipping halfway through. They won’t puff up as much, but they’ll still be crispy.
- Oven: You can also bake the pooris. Preheat the oven to 350°F (175°C). Brush the pooris with oil and bake for 15-20 minutes, flipping halfway through.
- Microwave: Not recommended for this recipe as it will not result in the desired crispy texture.
Nutritional Information (Approximate, per Poori):
- Calories: 120-150
- Fat: 6-8g
- Carbohydrates: 15-20g
- Protein: 2-3g
Note: Nutritional information is an estimate and may vary based on specific ingredients and cooking methods.
Serving Suggestions:
Rava Poori is incredibly versatile! Serve it with:
- Aloo Sabzi (Potato Curry): A classic pairing!
- Chole (Chickpea Curry): Another delicious and satisfying option.
- Shrikhand (Sweet Yogurt Dessert): For a sweet and savory combination.
- Pickle: Adds a tangy and spicy kick.
- Plain Yogurt: A simple and refreshing accompaniment.
Time to Cook!
Now that you have the recipe, it’s time to put on your apron and get cooking! I promise, the aroma of these crispy, golden Rava Pooris frying in your kitchen will fill your home with warmth and happiness.
Go ahead, try this recipe at home, share it with your friends and family, and let me know how it turns out! I’m eager to hear your feedback. Happy cooking, and until next time, keep those pots simmering and those smiles shining!