Ghughni: A Chatpata Treat from the Streets to Your Plate, Boss!
Namaste, friends! Kem cho? Assalamualaikum! Sat Sri Akal! Chef Curry Do-Pyaza here, back in your kitchens with a recipe that’s close to my heart – and even closer to my stomach! Today, we’re diving into the delicious world of Ghughni, a hearty and flavorful street food that’s a staple in eastern India, especially in Bihar, Jharkhand, and West Bengal.
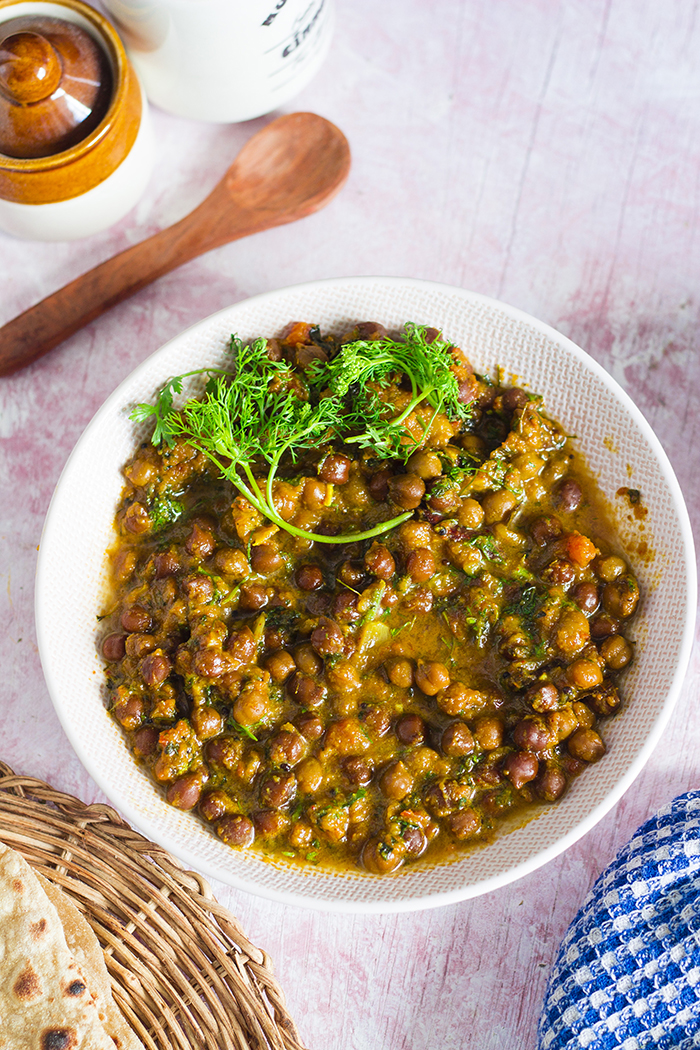
Ghughni is more than just a snack; it’s a feeling. It’s the taste of bustling markets, the warmth of community gatherings, and the joy of sharing good food with loved ones. You’ll often find this dish being enjoyed during festivals like Durga Puja, Diwali, and even during the cooler months of winter, when a steaming bowl of Ghughni provides the perfect comfort. It’s a dish that’s as versatile as it is tasty, enjoyed during evening tea, family get-togethers, or even as a light meal.
A Pinch of History
The history of Ghughni is as rich and layered as the dish itself. Originating in the eastern states of India, it’s believed to have evolved as a simple, affordable, and nutritious meal for the working class. Over time, it transformed into a beloved street food, with each vendor adding their unique twist to the recipe. It is a testament to Indian ingenuity, turning humble ingredients into a culinary masterpiece.
Let’s Get Cooking!
Preparation Time: 15 minutes (plus soaking time)
Cooking Time: 45 minutes
Ingredients:
- 1 cup Safed Matar (White Peas), dried
- 2 medium sized Pyaaz (Onions), finely chopped
- 1 inch Adrak (Ginger), grated
- 2-3 Lahsun (Garlic) cloves, minced
- 2-3 Hari Mirch (Green Chilies), finely chopped (adjust to your spice level)
- 1 teaspoon Haldi Powder (Turmeric Powder)
- 1 teaspoon Lal Mirch Powder (Red Chili Powder)
- 1 teaspoon Jeera Powder (Cumin Powder)
- 1/2 teaspoon Dhaniya Powder (Coriander Powder)
- 1/2 teaspoon Garam Masala
- 2 tablespoons Sarson ka Tel (Mustard Oil) or any cooking oil
- Fresh Dhaniya Patta (Coriander Leaves), chopped, for garnish
- Nimbu ka Ras (Lemon Juice), to taste
- Salt to taste
- 100 grams of Mutton/Chicken (Optional) – Small diced pieces
Step-by-Step Instructions:
- Soaking the Peas: First, rinse the white peas thoroughly. Then, soak them in plenty of water for at least 6-8 hours, or preferably overnight. This step is crucial for softening the peas and reducing cooking time. They’ll plump up beautifully!
- Pressure Cooking (Optional): Drain the soaked peas and add them to a pressure cooker with fresh water (enough to cover the peas by about 2 inches) and a pinch of salt. Cook for 4-5 whistles on medium heat. Let the pressure release naturally. This will make the peas wonderfully tender. If you don’t have a pressure cooker, you can boil the peas in a pot on the stove until they are soft, which will take longer.
-
Making the Masala: While the peas are cooking, heat mustard oil in a kadhai (wok) or a deep pan over medium heat. Once the oil is hot, add the chopped onions and sauté until they turn a beautiful golden brown. This is the base of your flavor, so don’t rush it!
-
Adding the Aromatics: Now, add the grated ginger, minced garlic, and chopped green chilies to the pan. Sauté for another minute until fragrant. The aroma will fill your kitchen with the promise of deliciousness!
-
Spice it Up! Add the turmeric powder, red chili powder, cumin powder, and coriander powder to the pan. Sauté for another minute, stirring constantly, to prevent the spices from burning. A splash of water can help keep the spices from sticking.
-
Add the Chicken/Mutton (Optional): Add the diced chicken/mutton pieces and saute until they are nicely browned.
-
Bringing it Together: If you pressure cooked the peas, gently mash some of the peas with the back of a spoon. This will help thicken the Ghughni. Add the cooked peas (with the water) to the pan with the masala. Add salt to taste and bring the mixture to a simmer.
-
Simmer and Savor: Reduce the heat to low and let the Ghughni simmer for about 15-20 minutes, allowing the flavors to meld together beautifully. Stir occasionally to prevent sticking. The gravy should thicken slightly.
-
Finishing Touches: Stir in the garam masala and simmer for another 5 minutes. Finally, garnish with fresh coriander leaves and a generous squeeze of lemon juice.
-
Serve Hot: Your Ghughni is ready! Serve it hot and enjoy the explosion of flavors!
Tips for the Best Ghughni
- Soaking is Key: Don’t skip the soaking step! It makes a huge difference in the texture and cooking time of the peas.
- Mustard Oil Magic: If you can, use mustard oil for an authentic flavor. But any cooking oil will work.
- Adjust the Spice: Feel free to adjust the amount of green chilies and red chili powder to suit your spice preference.
- Mash for Thickness: Mashing some of the peas helps to create a thicker, creamier texture.
- Fresh is Best: Use fresh ingredients whenever possible for the best flavor.
Cooking it Your Way
- Gas Stove: The classic method, perfect for simmering and controlling the heat.
- Induction Stove: Works just as well as a gas stove, providing precise temperature control.
- Pressure Cooker: Speeds up the cooking process significantly, especially for the peas.
- Slow Cooker/Crockpot: Cook on low for 6-8 hours for a deeply flavorful Ghughni.
- Microwave: Not recommended as the primary cooking method, but can be used to reheat leftovers.
Nutritional Information (Approximate, per serving):
- Calories: 250-300
- Protein: 15-20g
- Carbohydrates: 40-45g
- Fat: 8-12g
- Fiber: 10-12g
Note: Nutritional information may vary based on specific ingredients and portion sizes.
Serving Suggestions
- Serve hot in a bowl, garnished with chopped onions, coriander leaves, and a squeeze of lemon juice.
- Pair it with puffed rice (murmura) or chura (flattened rice) for a satisfying snack.
- Enjoy it with roti or paratha for a light meal.
- Top it with a dollop of yogurt or a sprinkle of sev (crispy chickpea noodles) for added texture and flavor.
Your Turn, Yaar!
Now it’s your turn to bring the flavors of the streets to your home! Try this Ghughni recipe and experience the magic for yourself. Share it with your friends and family, and let them savor the deliciousness of this classic Indian snack. Don’t keep this gem to yourself! Spread the love and the flavour!
Until next time, happy cooking!
Chef Curry Do-Pyaza signing off!