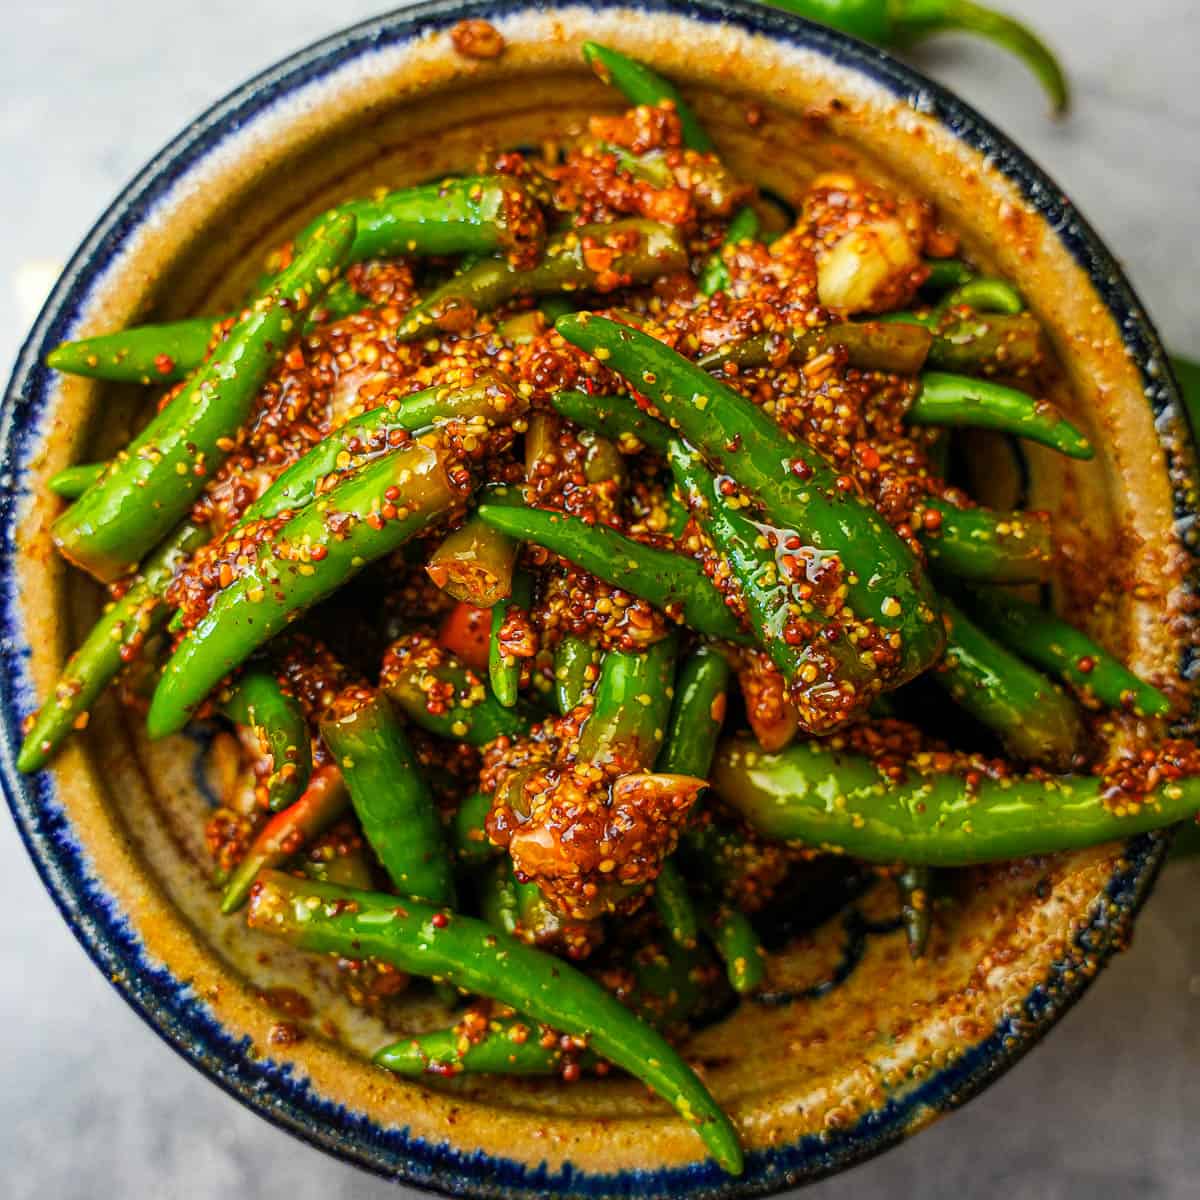
Mirchi Mania: Achar-fully Delicious Pickle Recipe!
Namaste, doston! Kem cho? Sat Sri Akal! Chef Curry Do’pyaza here, ready to spice up your life with a recipe that’s close to my heart – Mirchi Achar! (Chili Pickle).
This isn’t just any pickle; it’s a vibrant explosion of flavor that’ll make your taste buds sing a Bollywood tune! We Indians, we love our achar, don’t we?
When Do We Relish This Fiery Treat?
Mirchi Achar is a staple in many Indian households, especially during the hot summer months when fresh green chilies are abundant. It’s a must-have accompaniment during festive occasions like Diwali, Holi, and even just a simple Sunday lunch with the family. Think of it as sunshine in a jar, perfect for brightening up any meal! It’s also a popular item to pack for long journeys, adding a zing to every bite.
A Little Trip Down Memory Lane
The art of pickling has been around for centuries in India. It’s a fantastic way to preserve seasonal produce and create delicious condiments. Mirchi Achar, specifically, likely originated as a way to tame the fiery chilies that thrive in our climate. Each region has its own unique twist, using different spices and techniques. My recipe is a blend of traditions, passed down through generations of my family, with a little Chef Curry Do’pyaza magic thrown in!
Let’s Get Cooking!
Here’s what you’ll need to create this flavorful masterpiece:
- Preparation Time: 15 minutes
- Cooking Time: 20 minutes
Ingredients:
- 250 grams Hari Mirch (Green Chilies), preferably the thick, less spicy variety
- 2 tablespoons Sarson ka Tel (Mustard Oil)
- 1 teaspoon Rai (Mustard Seeds)
- 1/2 teaspoon Methi Dana (Fenugreek Seeds)
- 1/4 teaspoon Hing (Asafoetida)
- 1 teaspoon Haldi Powder (Turmeric Powder)
- 1 teaspoon Lal Mirch Powder (Red Chili Powder), adjust to your spice preference
- 1 tablespoon Amchur Powder (Dry Mango Powder)
- 1 tablespoon Dhaniya Powder (Coriander Powder)
- 1 teaspoon Saunf Powder (Fennel Powder)
- 2 tablespoons Sirka (Vinegar)
- Salt to taste
Let’s Get Spicy: The Cooking Process
- Prep the Chilies: Wash the green chilies thoroughly and pat them completely dry. This is super important! Moisture is the enemy of a good achar. Slit each chili lengthwise, being careful not to cut all the way through.
- Spice it Up: In a large bowl, combine the turmeric powder, red chili powder, amchur powder, coriander powder, fennel powder, and salt. Mix well.
- Stuffing Time: Gently stuff each slit chili with the spice mixture. Don’t overstuff them; just enough to fill the slit.
- Tempering the Oil: Heat the mustard oil in a pan over medium heat until it starts to smoke slightly. This is crucial for that authentic achar flavor. Let it cool down for a minute or two.
- The Tadka Magic: Add the mustard seeds, fenugreek seeds, and asafoetida to the cooled oil. Let them splutter for a few seconds.
- Gentle Sauté: Carefully add the stuffed chilies to the pan. Sauté them gently for about 5-7 minutes, stirring occasionally, until they soften slightly and the spices are fragrant.
- Vinegar Kiss: Pour in the vinegar and cook for another 2-3 minutes, allowing the vinegar to evaporate slightly.
- Cool and Store: Let the achar cool completely before transferring it to a clean, dry, airtight glass jar.
Chef Curry’s Top Tips for Achar Perfection
- Dry, Dry, Dry: Ensure the chilies and the jar are completely dry before you start. Moisture leads to spoilage.
- Mustard Oil is Key: While you can use other oils, mustard oil gives the achar its characteristic pungent flavor. Don’t skip it!
- Sun’s Out, Achar’s Out: Traditionally, achar is left in the sun for a few days to mature. This intensifies the flavors. If you have a sunny spot, give it a try!
- Spice Level: Adjust the red chili powder according to your spice tolerance. Remember, you can always add more, but you can’t take it away!
Achar Your Way: Cooking Method Variations
- Gas Stove: The method described above is perfect for a gas stove.
- Induction Stove: Follow the same steps as the gas stove method, adjusting the heat settings as needed.
- Pressure Cooker: Not recommended for this recipe, as the chilies can become too mushy.
- Oven: Not recommended for this recipe.
- Microwave: Not recommended for this recipe.
- Air Fryer: Not recommended for this recipe.
- Slow Cooker/Crockpot: Not recommended for this recipe.
Nutritional Information (Approximate, per serving):
- Calories: 50-70
- Fat: 4-6g
- Carbohydrates: 3-5g
- Protein: 1g
Please note that nutritional information can vary based on specific ingredients and portion sizes.
Serving Suggestions:
- Enjoy this zesty Mirchi Achar with parathas, roti, rice, or even as a side with your favorite Indian curries.
- It’s also fantastic with grilled cheese sandwiches or as a topping for avocado toast!
- Mix a spoonful into your yogurt for a spicy raita.
Time to Get Cooking!
So there you have it, folks! My secret to a lip-smacking Mirchi Achar. Now, go forth and create your own jar of sunshine. Don’t be afraid to experiment with the spices and make it your own.
Go ahead, try this amazing recipe and share the joy of home-made Indian Achar with your friends and family! Happy cooking!